Ever see a picture that just refuses to sit still? That's the charm of 3D pop out pictures. They're a clever visual illusion where the subject seems to literally break out of the frame, creating an incredible sense of depth and movement. It's the secret ingredient that turns a regular photo into something that leaps off the screen and grabs you.
The Magic Behind Breaking the Fourth Wall
So, what's the big idea? Why do these images feel so immersive and make us stop scrolling? It all comes down to tricking our brains. Our minds are wired to see depth using clues like shadows, perspective, and objects overlapping one another. A killer 3D pop out picture plays with these cues like a pro.
The main trick is to separate a subject from its background and let part of it spill over a defined border. This one simple move shatters the illusion of a flat image and creates an impossible-to-ignore focal point. Think of it like a tiny stage where your subject is the star, stepping right into the spotlight and into the viewer's world.
Why This Visual Trick Is So Dang Effective
The power of 3D pop out pictures isn't just a gimmick; it’s baked into how our brains process what we see. When something in an image breaks its own boundaries, it creates a jolt of surprise and curiosity. That little pattern-break forces us to lean in and really look at what's going on.
Here’s why it works so well:
- It's an Attention Magnet: In an endless feed of flat, boring images, a pop out effect is a guaranteed scroll-stopper. It’s different, it’s dynamic, and it practically begs for a second look.
- It Creates a Bullseye: By having an element burst out, you're essentially shouting, "Look right here!" This is incredibly handy for things like product photography, where you need one specific item to be the hero.
- It Tells a Better Story: A pop out picture can inject a dose of action or emotion. A basketball player jumping out of a frame feels more explosive, and a hand reaching out feels more personal and connected.
To really get a feel for the principles at play, it's worth checking out the techniques behind a good 3D drawing illusion. The very same concepts of shadow and perspective that make a sketch look three-dimensional on a piece of paper are what make these photos work.
From Social Media Feeds to Skyscraper Billboards
This isn't just a fun trick for your Instagram feed. The ideas powering 3D pop out pictures are being used on a massive scale, especially in advertising. The global 3D display market—the tech that brings these effects to life—was valued at an eye-watering USD 169.69 billion in 2023.
We're seeing an explosion of this in digital out-of-home (DOOH) advertising, especially in cities like Tokyo and Seoul. They have these enormous glasses-free 3D billboards where characters and products look like they're bursting out into the city streets. With that market projected to hit USD 636.08 billion by 2032, it’s pretty clear that breaking the frame is big business.
To make a truly great 3D pop out, a few key pieces need to work together in harmony.
| Element | What It Does | Why It Matters |
|---|---|---|
| Clear Subject | Provides a strong, easily identifiable focal point. | An ambiguous subject makes the effect confusing and weak. |
| Defined Frame | Creates the boundary for the subject to "break." | Without a frame, there's no illusion of escaping a 2D space. |
| Strategic Overlap | The part of the subject that extends beyond the frame. | This is the core action that creates the entire 3D illusion. |
| Realistic Shadows | Grounds the pop out element, making it feel present. | Poor or missing shadows make the subject look like a flat cutout. |
| Clean Edges | Ensures the subject looks naturally separated, not cut-and-pasted. | Jagged or blurry edges instantly break the illusion of reality. |
Each component builds on the last to sell the visual trick to our brains.
The most compelling visuals don’t just show you something; they make you feel something. A 3D pop out picture transforms a passive viewing experience into an active one by inviting the subject into your world.
At the end of the day, whether it’s a quick edit for a blog post or a massive digital billboard, the goal is identical. You're crafting an experience that feels more real, more engaging, and way more memorable than just another picture stuck in a box. It's an awesome tool for anyone looking to make their visuals stick.
Getting Your Hands Dirty: The Manual Art of the Pop
Alright, let's roll up our sleeves and dive into the craft of making your own 3D pop-out pictures. This is where the real fun begins, moving from theory to a hands-on, creative flow. We’re not talking about rigid, numbered steps here. Instead, think of this as a casual studio session where we'll take a flat photo and make it feel like it’s breaking through the screen. We'll be using tools like Photoshop or GIMP, but the principles are the same no matter what software you prefer.
The real work starts long before you even think about opening your editor. It begins with picking the right photograph. Honestly, this choice is more than half the battle and sets you up for a convincing effect.
Picking Your Champion Image
Look, not every photo is destined to pop. You need an image with a clear, dynamic subject that practically begs to break free from its digital frame. Think of a portrait where the person is gesturing towards the camera, a product shot with a bold silhouette, or an animal caught mid-leap.
So, what makes a photo the perfect candidate?
- A Clear Focal Point: The subject needs to be well-defined and easy to separate from everything else. A blurry, chaotic scene is your worst enemy.
- Action or Implied Motion: Pictures where the subject is reaching, jumping, or leaning forward already have a natural energy that supercharges the pop-out effect.
- Good Lighting and Sharp Focus: High-resolution photos with crisp edges are non-negotiable. You need all that pixel data to work with when you're making tricky selections around hair or other fine details.
A killer 3D pop-out picture isn't just a technical trick; it's about telling a story. The best ones feel like a single, frozen moment of a bigger narrative, and your job is to set that moment free.
Once you’ve found your champion, it’s time to get into the most critical part of the process: isolation.
The Art of a Flawless Cutout
Separating your subject from its background is the absolute foundation of this whole effect. A sloppy cutout will instantly kill the illusion, no matter how great your shadows are. This is where a little patience goes a long way, especially with challenging edges like hair, fur, or wispy fabric.
You'll need a good selection tool for this. While the quick selection tools are a decent starting point, you'll almost always have to go in and refine the mask by hand. My advice? Always use a layer mask instead of just deleting the background. It's a non-destructive way to work, which means you can easily fix any mistakes later. Pay close attention to the edges—a slightly feathered edge (maybe 1-2 pixels) usually looks far more natural than a razor-sharp cut.
This kind of visual wizardry is a big deal in the wider world. The 3D animation market, which is all about creating the depth illusions we see everywhere, was valued at a staggering USD 22.88 billion in 2023. It’s projected to rocket to USD 63.55 billion by 2033, showing just how much demand there is for eye-popping visuals. A huge chunk of that growth comes from media and entertainment, which grabbed a 36% revenue share in 2023, thanks to blockbuster films needing hyper-realistic effects. You can dig into the numbers yourself in the full 3D animation market analysis from SNS Insider.
After you've got a clean cutout, you can start building the 3D space. Duplicate your original image layer. On the bottom layer, create the "frame" that your subject will pop out of—this can be a simple white border or something more creative. Your cutout subject goes on the top layer, positioned above the frame. Now, you can carefully erase the parts of the subject that should stay "inside" the frame, leaving the "pop-out" sections overlapping the border.
The diagram below breaks down the core ideas behind this process: establishing depth, defining perspective, and grabbing the viewer's attention.

This just goes to show that a great image is more than a gimmick; it’s a guided journey for the eye.
Faking Reality with Light and Shadow
Okay, so your subject is popping out, but it probably looks like a sticker slapped on top of the picture. It feels floaty and disconnected. The secret to fixing this is to become a master of light and shadow. A believable shadow is what grounds your subject in its new reality.
Start by adding a new layer right under your subject layer but above the framed background. Look at the original photo to figure out where the light is coming from. Is it hitting from the top left? Is the light harsh or soft?
Using a soft, black brush with low opacity, gently paint in a shadow where your subject would naturally cast one onto the frame. Don't just make a black blob. Think about the shape. I often use transform tools like Warp or Distort to bend the shadow so it falls realistically across the frame's surface. The final touch is to dial back the shadow layer's opacity until it feels subtle. You might even add a slight Gaussian blur to soften the edges.
Highlights are just the reverse. If the part that's popping out would catch a bit of extra light, a tiny touch with a soft, white brush on a new layer set to an "Overlay" or "Soft Light" blending mode can add that final sprinkle of realism. Our guide on background removal has some extra tips that can help nail these initial stages.
By carefully thinking about how light interacts with your scene, you turn a simple cutout into something that feels like it truly exists in three-dimensional space. It's that attention to detail that separates an okay attempt from a professional-looking 3D pop-out picture.
Dodging the Common Pop-Out Pitfalls
Creating a truly convincing 3D pop out picture is a game of inches. It’s a delicate dance where one tiny misstep can completely shatter the illusion you're working so hard to build. Think of this as your field guide to navigating the common traps that make an image scream "amateur" and instantly pull the viewer out of the experience.
Let's dive into the most frequent blunders and how you can sidestep them, making sure your final image looks slick, professional, and completely believable.
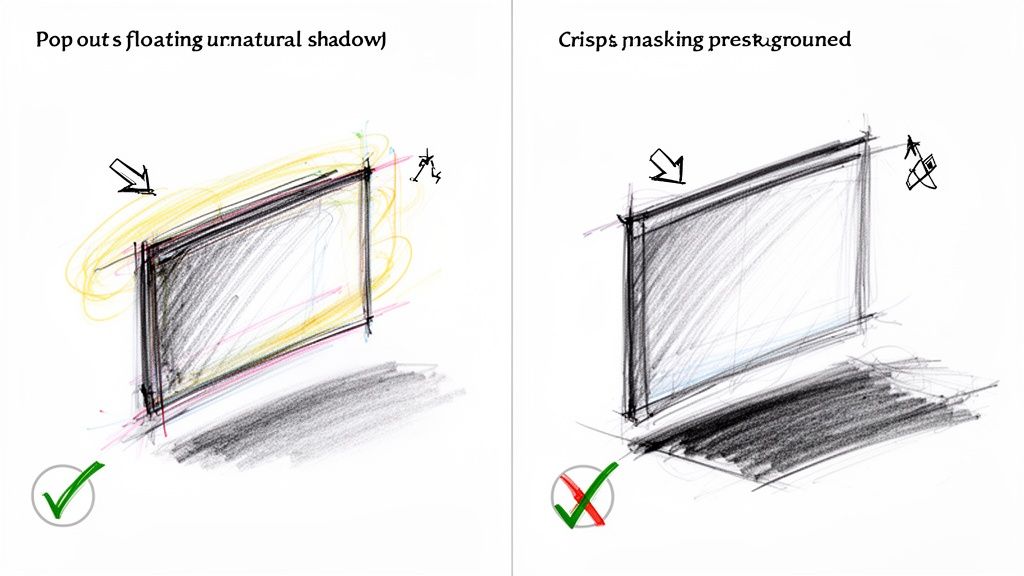
The Dreaded "Floating Subject"
One of the biggest giveaways of a novice edit is the dreaded "floating subject." This happens when the shadow—the very element that should anchor your object to its new reality—is either missing, way too dark, or shaped all wrong. The result? Your pop-out element looks less like it's bursting out of the frame and more like a cheap sticker slapped on top of the image.
To nail the effect, you first have to play detective with the light source in your original photo. Where's the light coming from? Is it harsh and direct, creating crisp, defined shadows? Or is it soft and diffused, casting gentle, blurry ones? Your new shadow has to mimic this existing light perfectly.
Here’s a quick-and-dirty checklist for better shadows:
- Get the Direction Right: The shadow has to be cast away from the main light source. No exceptions.
- Soften Those Edges: Real-world shadows rarely have razor-sharp edges. A subtle Gaussian blur (think 1-3 pixels) can work magic here.
- Dial Down the Opacity: A pure black shadow just looks fake. Drop that shadow layer's opacity to somewhere between 20-50% to let it blend naturally.
- Warp It Into Shape: Use your transform tools to bend and distort the shadow so it realistically wraps around whatever surface it's falling on.
The Perils of a Sloppy Cutout
Another huge pitfall is a bad mask. Nothing yanks a viewer out of the fantasy faster than seeing jagged, pixelated edges or a faint, glowing halo around your subject. These artifacts are a dead giveaway that the object was just cut and pasted, completely tanking the 3D pop-out effect.
This is especially true when you're dealing with tricky subjects like wispy hair, fuzzy fur, or anything semi-transparent. Your "magic wand" or quick selection tool is a great starting point, but it's never the final answer. You absolutely have to zoom in—way in—and get your hands dirty refining that mask.
The goal of masking isn't just to isolate the subject; it's to make it look like it was never part of the original background. A clean edge is an invisible edge. It's what lets the viewer's brain just accept the illusion without asking questions.
Getting that perfect cutout often means using a cocktail of tools. You might use a channel-based selection to grab fine hair details and then switch to the pen tool for the clean, geometric edges of a person's jacket, all on the same subject. Patience is your best friend here.
And if you notice your image looks a bit soft after all the editing, don't panic. You can often bring back that sharpness. Take a look at our guide on how to upscale an image using AI to restore that lost crispness.
Mismatched Perspectives Break the Brain
The final amateur mistake is forgetting about perspective. If your pop-out subject was shot from a low angle, but you place it in a frame that’s viewed straight-on, the whole thing feels… off. It's an uncanny valley effect; your brain knows something is fundamentally wrong, even if you can’t quite put your finger on it.
A basic grasp of vanishing points can be your saving grace. Just make sure the lines and angles of your subject align with the perspective of the frame and background. This simple check ensures you’re creating a single, cohesive scene instead of a jumbled collage of mismatched parts.
This idea of creating believable 3D forms is huge right now. It's even driving growth in industries like 3D printing, which is projected to become a USD 69.26 billion market by 2031. Asia Pacific is leading the charge, with China alone installing 40% of the world's industrial 3D printers. For a deeper dive, you can check out the full report on the 3D printing market.
Creating Pop-Outs at Scale with AI
Hand-crafting a single, jaw-dropping pop-out image is one thing. It's an art. But what about when your e-commerce store needs 500 of them for a new product launch by Friday? Or a marketing campaign that demands fresh visuals every single day? That’s when the meticulous, pixel-by-pixel manual process hits a wall. Hard.
This is where things get really interesting. Forget the hours spent meticulously tracing edges and painting shadows. We're talking about swapping all that tedious clicking for a simple, automated workflow that can churn out studio-quality 3d pop out pictures faster than you can make a cup of coffee.
Moving from Manual Grind to Smart Automation
For anyone in marketing, e-commerce, or development, time is the one thing you can't get back. Manually masking, creating shadows, and refining a single image can eat up anywhere from 30 minutes to a few hours. Multiply that by a full product catalog, and you're suddenly staring down a project that could take weeks.
AI automation throws that whole equation out the window. Instead of slogging through images one by one, you build a pipeline to process them in huge batches. And it’s not just about raw speed—it’s about consistency. An AI model applies the exact same rules and precision to the first image as it does to the five-thousandth. Your brand's visual style stays locked in, cohesive across every single asset.
This is the real power of an API-driven approach. You're letting a machine trained on millions of images do the heavy lifting.
A Real-World AI Workflow in Action
Let's get practical. Imagine you run an online apparel shop and just got a batch of 200 new product photos. Your mission: create dynamic, eye-catching 3d pop out pictures for every listing to make them jump off the screen.
Using an AI tool like PixelPanda, you can set up an automated sequence that just works.
- Instant Background Removal: First, you need to isolate the product. The AI immediately sees the subject—whether it’s a model in a jacket or a pair of boots—and vaporizes the background. It handles tricky details like flyaway hair and fuzzy fabric textures with shocking accuracy.
- Smart Depth-Aware Enhancements: This is where the magic really kicks in. The AI doesn't just perform a cookie-cutter cutout. It understands depth and dimension, automatically generating a soft, realistic drop shadow that grounds the product and gives it that tangible, pop-out feel.
- Automatic Upscaling and Refinement: Let's be honest, source images aren't always perfect. The AI can upscale the image by 4x, pulling out crisp details without making it look like a grainy mess. It also cleans up the edges and can even give a subtle touch-up to a model's face, delivering a polished, professional look every time.
This little diagram gives you a peek into how an AI pipeline takes a basic photo and transforms it into a ready-to-go marketing asset in moments.
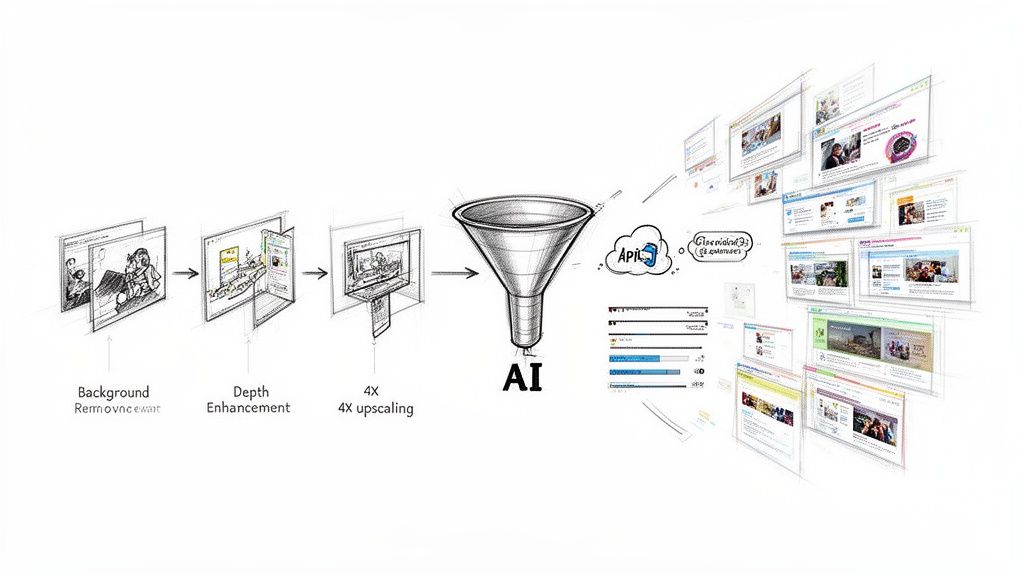
This entire chain of events, from raw photo to finished pop-out, happens in seconds per image. Not hours.
By automating the technical grunt work, your creative team is free to focus on what they do best: strategy, storytelling, and building a connection with your audience. Let the machine push the pixels while you focus on the purpose.
Manual Effort vs. AI Efficiency: A Head-to-Head Look
To really drive the point home, let's put the old way and the new way side-by-side. The difference in time, cost, and scale is pretty staggering.
Manual Editing vs. AI Automation with PixelPanda
| Feature | Manual Process (e.g., Photoshop) | PixelPanda API |
|---|---|---|
| Time Per Image | 30-60+ minutes | 5-10 seconds |
| Scalability | Brutally low; more images means more hours | Insanely high; process thousands in parallel |
| Consistency | Varies by designer, mood, and caffeine level | Flawlessly consistent, every single time |
| Required Skill | High-level proficiency in editing software | Basic API know-how or no-code tool use |
| Cost | High (editor's salary or freelancer fees) | Low (pay-per-use or subscription) |
| Revisions | A time-consuming, frustrating back-and-forth | Instant; just tweak a parameter and re-run |
The table says it all. While a human touch is unbeatable for a bespoke, hero image, AI is the undisputed champ for volume and efficiency. For businesses that need to move fast, this isn't just a nice-to-have; it's a completely different way of producing visual content. If you're looking to bring this kind of efficiency to your marketing, checking out AI-driven ad creative generation tools is a great next step to see what's possible.
And this kind of automation isn't just for developers anymore. With no-code platforms like Zapier or Make, anyone can rig up a workflow. For example, you could create a "magic folder" in Google Drive. Drop a raw photo in, and a few minutes later, the finished 3d pop out pictures appear in another folder, ready for your website.
The real win here is speed to market. You can get new products listed faster, launch campaigns sooner, and A/B test different visual styles without sinking a ton of time and money into production. Diving deeper into how PixelPanda AI Product Photos can open your eyes to even more powerful workflows. For any business driven by visuals, that kind of agility is a massive competitive edge.
So, What's Next? Putting It All Into Practice
Alright, we've covered a ton of ground, from the nitty-gritty of manual editing to the mind-blowing speed of AI automation. Now it’s time to stop reading and start doing. This is where you take everything we've talked about and actually create those 3D pop out pictures that make people stop scrolling and stare.
Whether you're a creative who loves getting their hands dirty in Photoshop or a business that needs eye-catching visuals by the boatload, there's a path for you. The real trick is figuring out which one fits your needs, your timeline, and your goals. One way gives you ultimate control; the other gives you incredible speed.
Pick Your Poison: Artist or Automator?
First things first, you need to decide which camp you’re in. Are you crafting a single work of art or churning out a whole catalog of images?
If you're the meticulous type who enjoys the process, the manual route is your happy place. You get to control every last pixel, fine-tuning the feathering on a mask or getting the angle of a shadow just right. This is the way to go for those jaw-dropping hero images, portfolio centerpieces, or any project where your personal touch is the whole point.
On the other hand, if you’re running a business, an e-commerce shop, or a marketing campaign, time is money. The AI-powered approach using a tool like PixelPanda is your fast track to pro-level results without the hours of tedious work. It’s perfect when you need hundreds—or even thousands—of consistent, high-quality images for product listings, social media, or ad campaigns.
Let's be clear: it's not about which method is "better." It's about what you're trying to accomplish. Are you telling one amazing story, or are you building an entire visual empire?
No matter which path you take, the core principles don't change. A killer pop-out effect always comes down to a super clean subject cutout, a convincing illusion of depth, and a healthy respect for how light and shadow play together.
The Manual Creator's Pre-Flight Checklist
For all you hands-on artists ready to dive back into your editor of choice, here’s a quick checklist to run through before you start your next masterpiece.
- Choose Wisely: Is your source photo dynamic? Does it have a clear subject and decent lighting to begin with?
- Isolate Like a Surgeon: Is your subject’s mask clean? Are the edges refined, especially around tricky bits like hair or fur?
- Set the Stage: Have you defined a clear border or frame for your subject to burst out of?
- Master the Shadows: Does your drop shadow actually look real? Check its direction, softness, and transparency against the original lighting.
- Check Your Angles: Do the perspectives of your subject and the background actually match up?
Ready to Go Big with Automation?
If you’re thinking bigger and need to scale your visual content, the choice is pretty obvious. Manual editing just can't keep up with the demands of a modern business. It's time to see what an AI workflow can do for your bottom line.
Why not see the magic for yourself? Head over to the PixelPanda website, check out the developer docs, and give the API a spin with our pretty generous free trial. Honestly, there's no better way to grasp the power of automation than to feed it your own images and watch studio-quality results pop out in seconds. It's time to stop making flat, forgettable images and start creating visuals that actually demand attention.
Got Questions? We've Got Answers
Alright, you've seen the magic behind the curtain, but you might still have a few things rattling around in your brain. That's totally normal. Let's tackle some of the most common questions that pop up when people start making these awesome 3d pop out pictures.
What Kind of Photos are Easiest to Work With?
You want to set yourself up for success, right? The absolute best photos for this effect have a really clear, defined subject that isn't tangled up with the background. Think of a clean portrait shot or a crisp photo of a product against a simple wall. That strong separation is your best friend—it makes isolating your subject a breeze, which is the cornerstone of this whole illusion.
High-resolution images are also a massive help. They give you so much more data to play with, which is a lifesaver when you’re wrestling with tricky selections around hair, fur, or the fuzzy edge of a favorite sweater. Try to steer clear of super cluttered scenes where your main subject gets lost in the noise. Trust me, those are just a one-way ticket to a headache and a much less convincing final image.
Can I Actually Do This on My Phone?
You sure can, but it’s a classic case of "you get what you pay for." There are tons of mobile apps that do a decent job of removing backgrounds and letting you stack layers to get a similar effect. For a quick share on social media or a fun Instagram story, they're perfectly fine and can get you 90% of the way there in a pinch.
But—and this is a big but—if you're creating visuals for a professional marketing campaign, your website, or an e-commerce store, you'll feel the limitations of a mobile app pretty fast. Desktop software or a heavy-hitting AI tool like the PixelPanda API gives you a level of precision, cleaner results, and a higher-quality final product that phones just can't touch right now. The control you get over shadows, highlights, and refining those tiny edge details is in a completely different league.
The tool should always match the job. For a quick, playful edit, your phone is great. For a polished, professional image that needs to look incredible, you need tools built for precision.
Is an AI Tool like PixelPanda Super Complicated to Use?
Not at all! That's one of the biggest myths. While developers can get their hands dirty with the super-flexible API, it’s built to be dead simple for everyone else. You can use no-code platforms like Zapier or Make to plug PixelPanda right into your current process without typing a single line of code.
For instance, you could whip up a quick automation that grabs any new photo dropped into a Google Drive folder, runs it through the process, and saves the finished 3d pop out pictures to another folder. Easy peasy. Plus, the platform has a hands-on demo gallery where you can throw your own images in and watch the AI do its thing before you even sign up.
How Do I Make the Shadow Look Real and Not… Weird?
Getting the shadow right is the secret sauce. It's what sells the whole "popping out" illusion. If you mess this up, your subject just looks like a cardboard cutout floating in space.
First, put on your detective hat and look at your original photo to see where the light is coming from. Once you know that, create a new layer right under your popped-out subject. Grab a soft, black brush, knock the opacity way down (start around 30-40%), and gently paint in where the shadow would naturally fall. You can then use the transform tool to stretch and warp it to fit the surface it’s on.
The last step is the most crucial: dial back the shadow layer's opacity until it feels natural, not like a big dark smudge. Sometimes, adding a tiny bit of blur helps soften the edges and makes it blend seamlessly. It's all about subtlety.
Ready to stop doing all the heavy lifting yourself? With the PixelPanda API, you can automate everything from background removal to smart, depth-aware enhancements and create stunning visuals at scale. Try PixelPanda for free and see how easy it is to produce studio-quality 3d pop out pictures in seconds.