
AI has made creating dynamic video backgrounds fast and simple. These animated visuals replace static backdrops, improving viewer engagement on platforms like TikTok, Instagram, and YouTube. By using advanced tools powered by Generative Adversarial Networks (GANs) and diffusion models, you can generate motion-filled scenes in just minutes – no green screens or heavy editing required. Here’s what you need to know:
- Why It Matters: Videos with static backgrounds lose viewers quickly. Animated backdrops boost retention.
- How It Works: AI separates the subject, background, and motion to generate realistic scenes. Tools like PixelPanda use text prompts to create customized visuals.
- Key Steps:
- Write detailed prompts (e.g., lighting, motion, style).
- Use AI tools like PixelPanda for background generation.
- Customize for platform-specific needs (aspect ratio, branding, etc.).
- Cost and Speed: AI reduces time and costs significantly. Videos can cost as little as $5 compared to $150+ for traditional methods.
AI tools like PixelPanda streamline this process, allowing creators of all skill levels to produce professional-looking content efficiently.
Make Video Backgrounds with AI for FREE | Simple Step-by-Step Tutorial
How AI Generates Dynamic Video Backgrounds
AI crafts dynamic video backgrounds by leveraging neural networks trained on vast collections of video clips. These systems don’t just blend images – they analyze and replicate natural motion, lighting, and object interactions. Two key techniques power this process: Generative Adversarial Networks (GANs) and diffusion models, both designed to deliver lifelike results by studying extensive datasets.
Understanding Generative AI Models
Generative AI breaks video creation into three key components: the foreground (the main subject), the background (the setting), and motion (how everything moves over time). This separation allows the AI to manage each element individually before merging them into a cohesive video.
GANs take a multi-branch approach, modeling the foreground, background, and motion separately to ensure consistency without requiring manual adjustments. On the other hand, diffusion models transform random noise into structured video frames through iterative processes. Examples like Adobe Research‘s ActAnywhere, trained on 2.4 million videos, and OpenAI‘s Sora, which maintains 3D consistency over extended footage, demonstrate how these methods create backgrounds that respond naturally to subject movement.
How Motion and Style Parameters Work
Generative techniques are further enhanced by motion and style parameters, which fine-tune the realism of video backgrounds.
- Motion parameters: These ensure that background movement aligns perfectly with the subject. By using tools like Plücker embeddings, the AI links camera trajectories to individual pixels, avoiding the unrealistic "floating" effect where elements fail to match the scene. Camera pose control, trained on datasets like DynaScene with 200,000 video clips, guides movements like panning, zooming, and tilting with precision.
- Style parameters: These focus on adaptive lighting and texture consistency, ensuring smooth blending between the subject and the background.
In December 2025, Over++ introduced automated compositing effects that mimic real-world interactions – such as shadows, reflections, dust, and splashes – without needing extra pose or depth data. This innovation eliminates hours of manual editing while maintaining natural light-object dynamics, making video creation faster and more efficient.
Step-by-Step Guide to Creating Dynamic Video Backgrounds
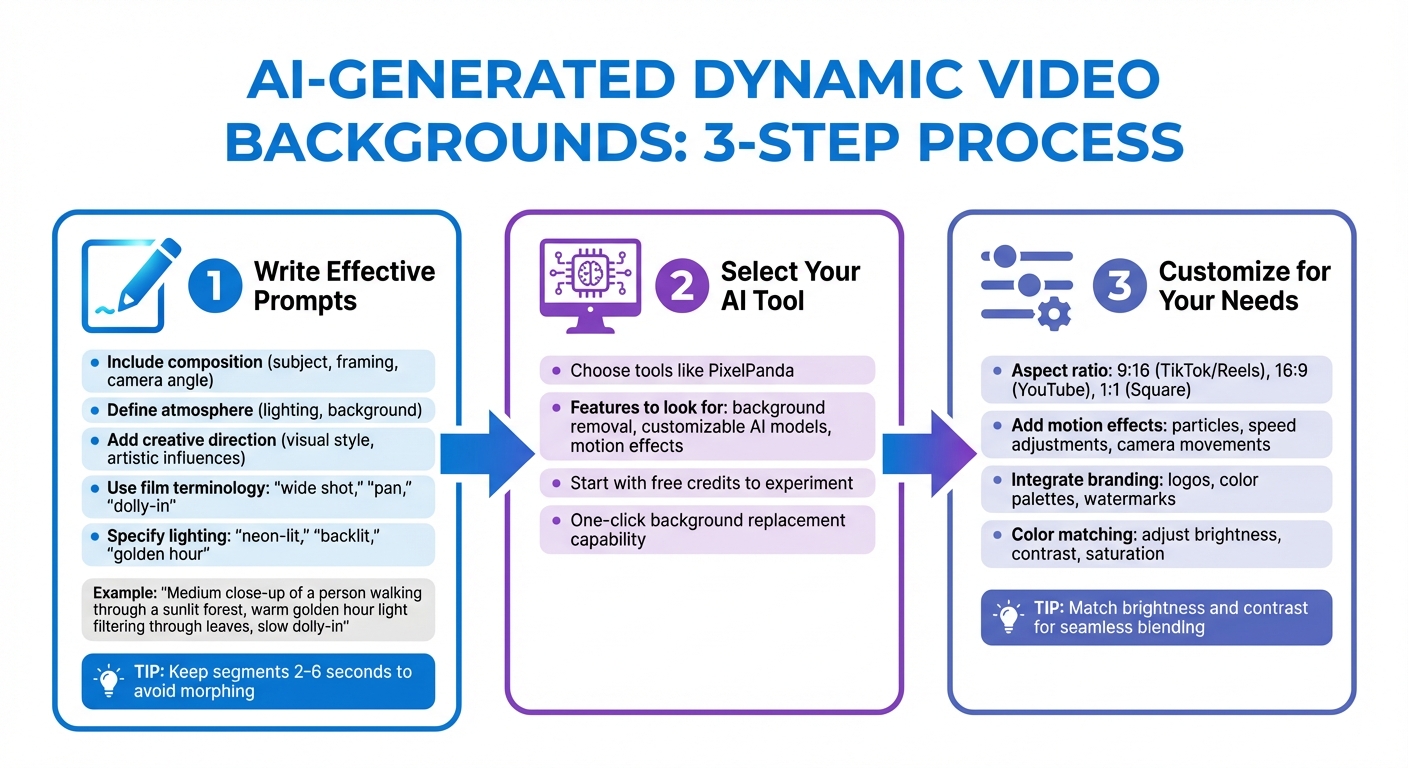
3-Step Process for Creating AI-Generated Dynamic Video Backgrounds
Making dynamic video backgrounds with AI involves a straightforward process: craft precise prompts, choose the right tools, and fine-tune the output to suit your needs. Let’s break it down.
Step 1: Writing Effective Prompts
Your prompt is the blueprint for the AI, so clarity and detail are essential. A strong prompt includes three key elements: composition (subject, framing, camera angle), atmosphere (lighting, background), and creative direction (visual style, artistic influences). For example, instead of saying, "a person in a forest", try: "medium close-up of a person walking through a sunlit forest, warm golden hour light filtering through leaves, slow dolly-in."
Film terminology like "wide establishing shot", "pan", or "dolly-in" helps define camera movements and perspectives, resulting in more predictable outcomes. Similarly, use precise lighting terms such as "neon-lit", "backlit", or "cinematic warm sunlight" instead of vague descriptions. If you’re creating looping backgrounds, describe a scene where the first and last frames naturally align to avoid abrupt transitions.
"Stop thinking ‘Prompts.’ Start thinking ‘Shots.’" – Neolemon
Some creators prefer an image-to-video workflow: first, generate a high-quality still image to establish the visual style, then describe the motion. This "Hybrid Keyframe" method (Lane B) provides better consistency, especially for characters or branded elements. To maintain quality, keep background segments short – around 2 to 6 seconds – to avoid unwanted morphing effects.
Once your prompt is ready, the next step is selecting an AI tool to bring your vision to life.
Step 2: Selecting Your AI Tool
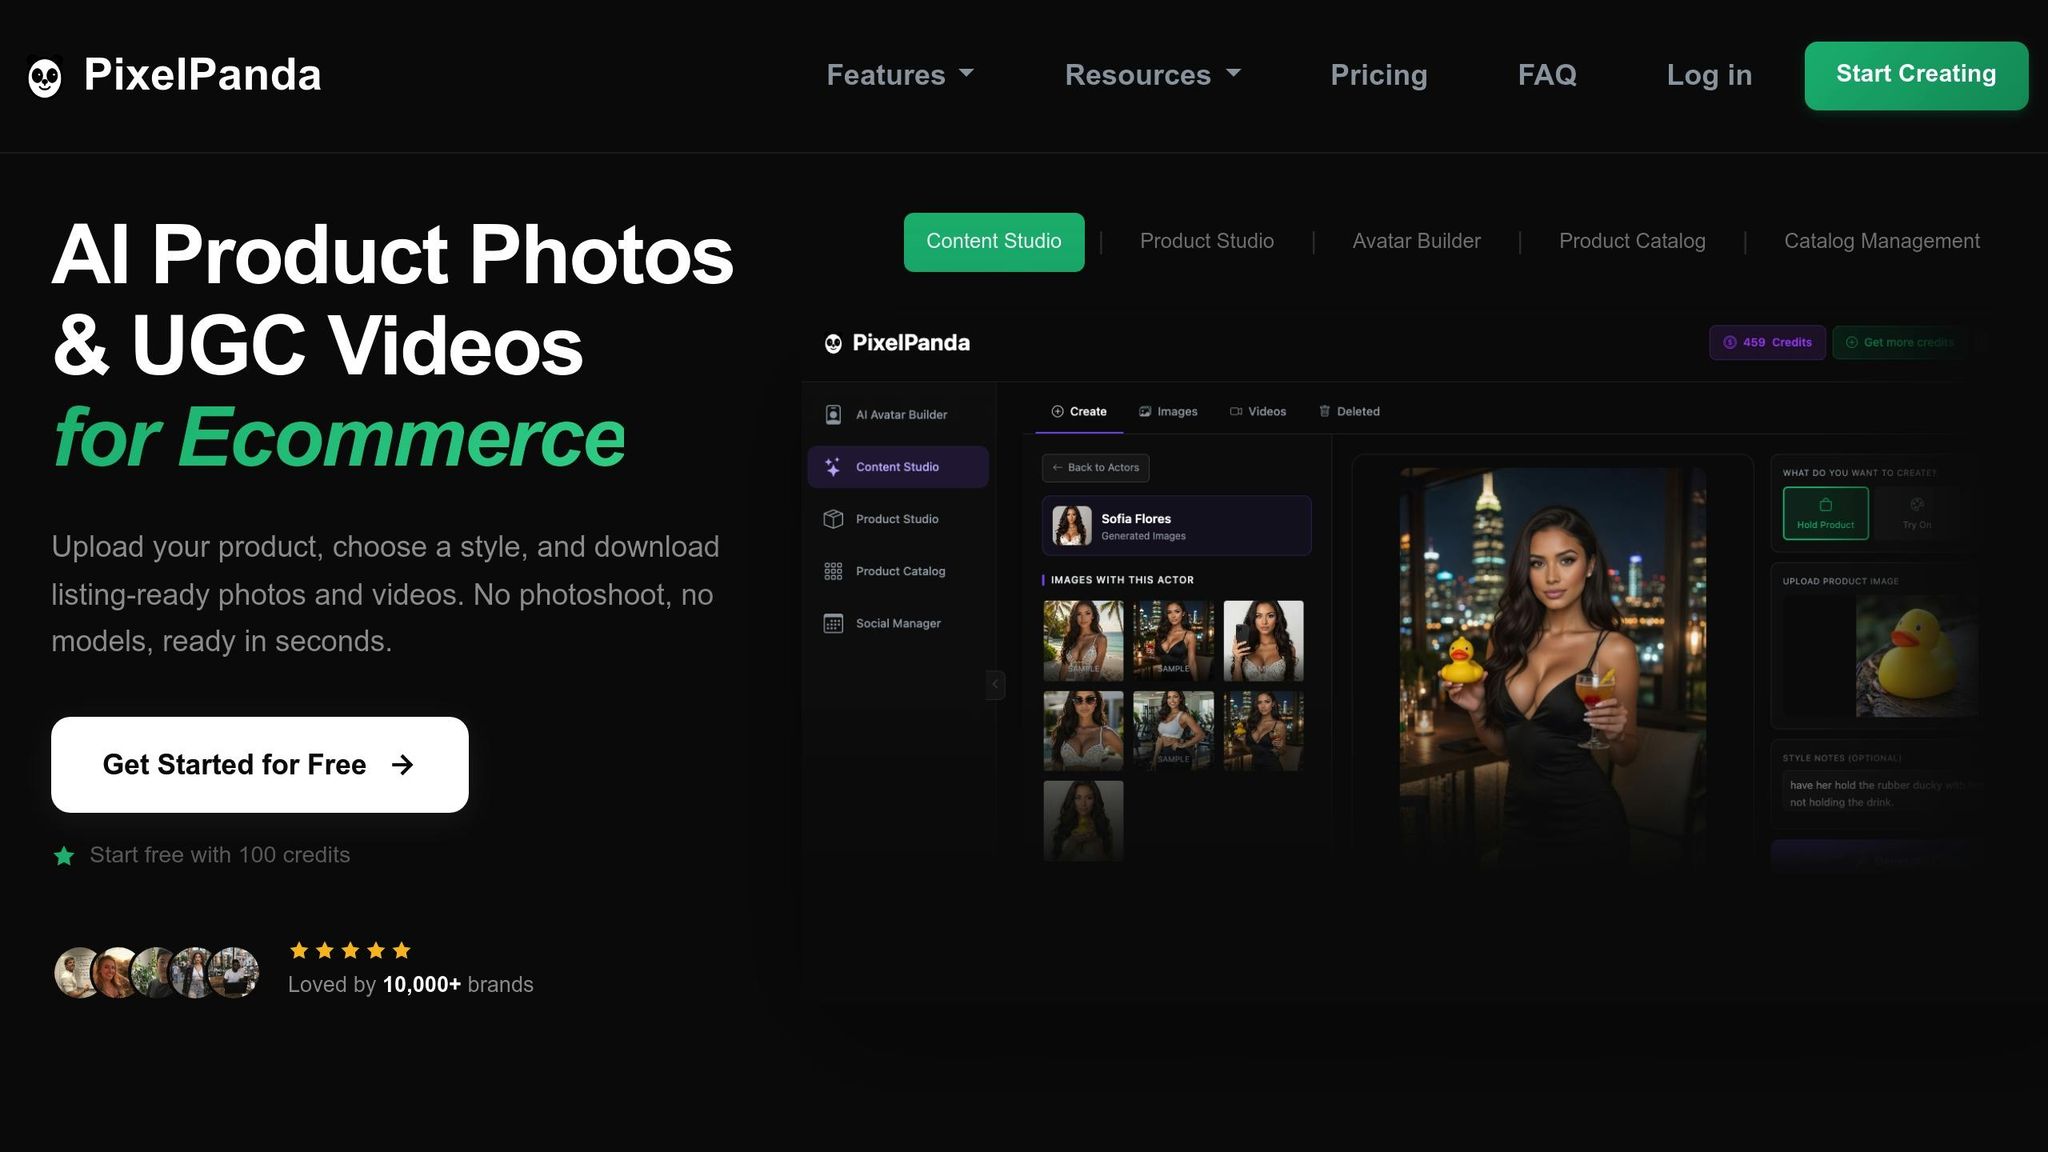
PixelPanda is a great option for creating dynamic backgrounds. It offers features like background removalixelpanda.ai/free-tools/background-remover”>background removal, customizable AI models, and motion effects that integrate seamlessly with existing footage. Beginners can experiment with 100 free credits to explore different styles. One standout feature is the ability to remove a background from pre-recorded footage and replace it with an AI-generated one in a single click. This makes it especially useful if you’re working with existing content.
After choosing your tool, the focus shifts to fine-tuning the AI-generated background to match your specific requirements.
Step 3: Customizing Backgrounds for Your Needs
Once the AI generates your background, customization ensures it aligns with your platform and branding. Here are some adjustments to consider:
- Aspect ratio: Choose 9:16 for TikTok and Instagram Reels, 16:9 for YouTube, or 1:1 for square posts.
- Motion effects: Add elements like particle effects, adjust playback speed, or incorporate camera movements such as zooms or parallax shifts.
- Branding: Integrate your logo, use custom color palettes, or add animated watermarks for a cohesive look.
- Color matching: Adjust brightness, contrast, and saturation to blend the subject seamlessly with the background.
"If you want a seamless background change, try adjusting the brightness and contrast of your new background to match the original video. This blending trick can make the final result look more natural." – Joey Edits, Video Editor and Content Creator
Adding color overlays or filters can unify the tone of the subject and background. For example, if one element feels too warm or cool, a subtle color wash can make the entire composition feel more cohesive.
sbb-itb-76ad1b7
Integrating AI-Generated Backgrounds into Videos
Once you’ve customized your AI-generated background, the next step is blending it seamlessly with your original footage. To achieve this, place the AI-generated background on the primary track in your video editor, then overlay your subject (with its original background removed) on a higher track. Most editing software provides overlay modes that help with precise positioning. This setup ensures a smooth integration between your subject and the AI background.
Using Editing Tools for Integration
There are several methods for removing the original background from your subject, depending on your needs and the complexity of the footage. AI-powered tools are great for quick edits, especially for social media content. Chroma keying works well when the lighting is controlled, while manual masking is ideal for footage with intricate details. For instance, tools like Filmora offer both "Quick" and "Precise" modes – the latter being better suited for handling fine details.
Color matching is another crucial step. Use settings like Edge Feather to soften the edges around your subject, ensuring a natural transition between layers. Additionally, advanced features like Extend Background can expand the visible area around your subject using generative AI, maintaining consistent motion and lighting throughout.
For the best results, always export your video in high resolution – 1080p or 4K. Lower resolutions can make the background appear pixelated or poorly integrated.
Tips for a Professional Finish
After layering your subject and background, focus on refining the details for a polished look. Lighting consistency is critical. Ensure the direction and tone of the light match between your subject and the AI background. For example, if your subject is lit by warm sunlight from the left, the background should reflect similar lighting conditions. You can enhance realism further by adding environmental elements like fog, rain, or dust particles to your prompts, which helps ground your subject within the scene.
Pay attention to frame rates as well. Your background and foreground footage should share the same frame rate – commonly 24, 30, or 60 fps – to avoid any jitter or stuttering. Advanced tools like Robust Video Matting can handle 4K resolution at 30fps in real-time, but maintaining consistency across all elements is essential.
Finally, ensure your backgrounds are created in the correct aspect ratio for your platform. Use 9:16 for TikTok and Instagram Reels, and 16:9 for YouTube, to avoid cropping or stretching issues. For fast-moving subjects, enable "motion-aware" algorithms or slightly increase AI sensitivity (by 5–10%) to prevent segmentation glitches. Always preview your video at full frame rate before publishing to catch any artifacts or errors.
PixelPanda Pricing and Features for Dynamic Video Backgrounds
PixelPanda offers three pricing options tailored to different production needs, with discounts available for annual billing. The Starter Plan is priced at $39 per month when billed annually or $59 per month with monthly billing. It includes up to 25 videos and 500 images each month. The Growth Plan costs $59 per month (annually) or $89 per month (monthly) and increases the limits to 45 videos and 900 images. For creators with higher demands, the Pro Plan is available at $89 per month (annually) or $119 per month (monthly), offering up to 55 videos and 1,100 images.
All plans come with full commercial usage rights, meaning you can use the AI-generated backgrounds in ads, social media posts, and e-commerce listings without limitations. Plus, PixelPanda has a credit rollover feature – unused credits accumulate monthly and never expire. This is especially helpful for seasonal campaigns or larger projects. Currently, more than 10,000 e-commerce brands depend on PixelPanda for professional-grade photography and video content. Below is a detailed comparison of the features included in each pricing tier.
PixelPanda Pricing Plans Comparison
| Feature | Starter Plan | Growth Plan | Pro Plan |
|---|---|---|---|
| Monthly Price (Annual) | $39.00 | $59.00 | $89.00 |
| Monthly Price (Monthly) | $59.00 | $89.00 | $119.00 |
| Video Limit (Annual) | Up to 25 | Up to 45 | Up to 55 |
| Image Limit (Annual) | Up to 500 | Up to 900 | Up to 1,100 |
| Languages Supported | 35+ | 35+ | 35+ |
| UGC Studio | Included | Included | Included |
| Product Holding | Included | Included | Included |
| Outfit Swapping | Included | Included | Included |
| Commercial Rights | Included | Included | Included |
PixelPanda’s plans are designed to combine affordability with robust features, making it a strong choice for creating dynamic video backgrounds efficiently.
Its credit system further enhances the platform’s appeal. Creating a video requires at least 75 credits (or 35 credits per 10 seconds for longer clips), and each image costs just 1 credit. The cost savings are impressive – videos average around $5 each (compared to $150–$500+ with traditional methods), while images cost about $0.10 (versus $25–$150+ for conventional photography).
Additionally, PixelPanda provides access to a library of over 100 AI models for generating realistic talking-head videos, ideal for social media content. The platform is also fast: images typically take 15–20 seconds to generate, while videos are ready in just 1–2 minutes. This speed and efficiency make PixelPanda a valuable tool for content creators looking to produce high-quality visuals on a budget.
Conclusion
AI tools have transformed the way video backgrounds are created, making it possible to generate dynamic visuals in just minutes using a simple text prompt. By 2033, the video background remover market is expected to skyrocket from $10 million in 2025 to $723 million, growing at an impressive annual rate of 46.4%.
For newcomers, the process has never been easier. Forget complicated editing software – AI tools now handle everything. From adjusting art styles and camera angles to perfecting lighting effects, one-click customization options take care of it all. Even intricate tasks like frame-by-frame segmentation are automated, making professional-quality results accessible to everyone. This not only saves time and money but also empowers creators across all skill levels.
Consider the cost savings: traditional product photographyxelpanda.ai/ai-product-photos”>product photography ranges from $25 to $150+ per image, while AI-generated alternatives cost just $0.10. On top of that, AI can cut video editing time in half. Take PixelPanda, for example. With pricing plans starting at $39 per month (billed annually), it offers an affordable, efficient solution for creating social media content, e-commerce videos, or marketing materials. Whether you’re a beginner or a seasoned pro, AI tools like PixelPanda make high-quality video creation more accessible than ever.
FAQs
How do AI tools like GANs enhance video background creation?
AI tools like Generative Adversarial Networks (GANs) are transforming the way video backgrounds are created, delivering stunningly realistic and visually engaging results. These networks generate photorealistic backgrounds that blend effortlessly with the motion and context of the video’s foreground, resulting in a seamless and immersive visual experience.
By automating the background creation process, GANs not only save time and effort but also open up limitless creative opportunities. With AI’s help, even those with limited technical skills can produce high-quality, professional-looking video content, redefining what’s possible in video production.
What are the cost advantages of using AI to create video backgrounds?
Using AI for video backgrounds can slash production costs by eliminating the need for pricey studio setups, on-location shoots, and time-consuming manual editing. This means you can create high-quality visuals without putting a strain on your budget.
These tools simplify the process, saving both time and money while still delivering polished, professional results. This cost-effectiveness levels the playing field, offering creative opportunities to businesses of all sizes – from startups to well-established brands.
How can I make sure an AI-generated video background aligns with my brand’s style?
To make sure an AI-generated video background matches your brand’s identity, start by integrating your core brand elements – things like your logo, color scheme, and fonts. Many AI tools let you upload these assets directly, making it easier to create visuals that reflect your brand.
You can also fine-tune backgrounds by choosing colors, patterns, and styles that align with your overall aesthetic. Some tools even offer animated designs or branded templates, helping you achieve a polished, cohesive look. This ensures your videos maintain a consistent, professional appearance across all platforms.