Let’s be honest—your product photography lighting setup is the single most important thing that separates a drool-worthy brand from an amateur-hour garage sale. It’s the magic ingredient that turns a flat, boring snapshot into an image that practically screams "buy me now!"
Why Great Lighting Is Your Secret Sales Weapon
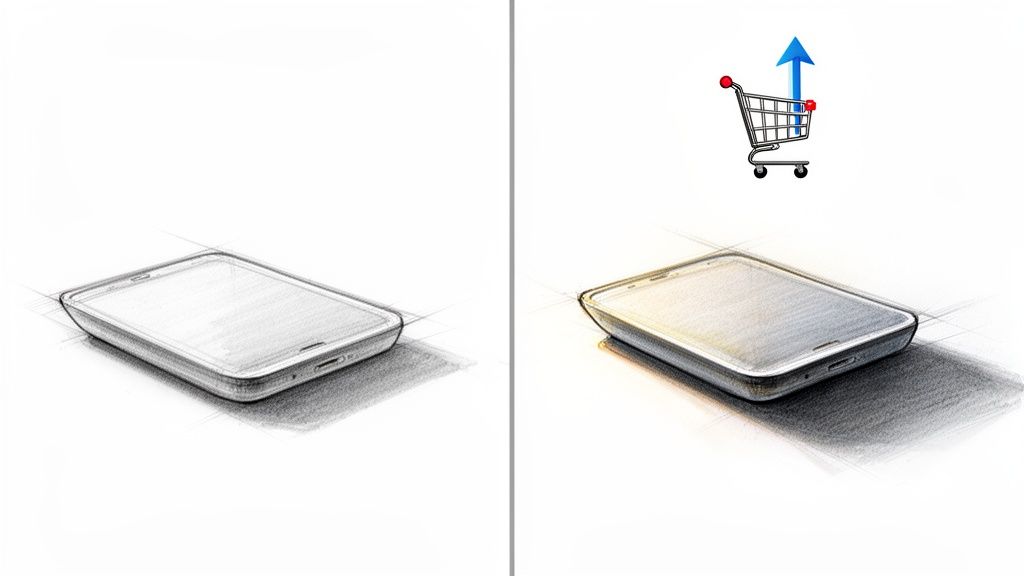
Think of your product photos as the front window of your digital store. If the lighting is terrible, it’s like having a grimy window and a sign with half the letters burned out. It doesn't just look bad; it actively repels customers and tanks your sales before they even think about clicking "Add to Cart."
 e-commerce shopping cart and upward arrow.” />
Light is your most powerful tool. Bad lighting creates ugly, distracting shadows or completely flattens your product, hiding all the details you worked so hard to perfect. But a great lighting setup? It carves out every curve, highlights every texture, and shows off colors exactly as they are. This isn't just about making things look pretty; it's about clear, honest communication with your buyer.
Good Lighting Builds Instant Trust
When a product is lit beautifully, it feels real. It tells the customer, "Hey, we've got nothing to hide. What you see is exactly what you’ll get." That kind of visual honesty is what gives someone the confidence to pull out their credit card.
If you’re selling clothes, for example, the right light shows the true color and feel of the fabric—no surprises. For a deep dive into this, check out this guide on how to take a perfect picture of clothes that sells more online.
This isn't just theory; the numbers don't lie. Stunning product images, all thanks to proper lighting, can pump up conversion rates by a staggering 67%. And considering that 74% of shoppers depend almost entirely on product photos, getting the lighting right is your best defense against costly returns.
Here's the bottom line: The goal of your lighting isn't just to make a product visible. It's to make it desirable.
Lighting Impact on Key E-commerce Metrics
It’s easy to see how a few tweaks to your lighting can send ripples across your entire business. Here's a quick look at how specific improvements directly influence the numbers that matter most.
| Lighting Improvement | Direct Business Impact | Metric Affected |
|---|---|---|
| Accurate Color Representation | Fewer returns from "not as described" complaints. | Return Rate |
| Clear Detail & Texture | Builds customer confidence and perceived quality. | Conversion Rate |
| Clean, Professional Look | Establishes brand credibility and premium feel. | Average Order Value |
| Consistent Lighting Style | Creates a cohesive, trustworthy brand experience. | Customer Loyalty |
As you can see, investing in a solid lighting setup isn't an expense—it's a direct investment in your most important business metrics.
Justify Premium Prices, Just by Using Light
Want to charge more for your products? Start with your lighting. When an item is presented in a clean, professional, and beautifully lit environment, it just looks more valuable.
Customers judge quality with their eyes first. A polished photo subconsciously tells them your product is worth the higher price tag. You're not just selling an item; you're selling the confidence and craftsmanship that your images project.
Of course, for any e-commerce business juggling hundreds or thousands of products, keeping that quality consistent is a beast. But investing in a good lighting setup is the first and most critical step. It’s a direct investment in your brand’s reputation and, ultimately, your bottom line.
Building Your Lighting Toolkit On Any Budget
Alright, let's talk gear. Diving into the world of product photography lighting can feel like you’ve been handed a blank check in a candy store—exciting, sure, but where do you even start? The great news is, you don’t need a Hollywood-sized budget to create images that actually sell your stuff.
Whether you're bootstrapping this whole thing or you've got some cash to play with, the core principles of good lighting never change. It’s all about picking the right tools for the job.
And it’s a good time to be in the market. The global demand for photography lighting hit a whopping $2.5 billion in 2023 and is on track to nearly double by 2032. That boom is driven by e-commerce brands just like yours who get it: killer images are everything. You can nerd out on the full market trends over on dataintelo.com.
What does that mean for you? More options, better prices, and a ton of innovation. The trick is simply knowing what to buy and when to get scrappy with a DIY fix.
The Great Debate: Strobes vs. Continuous Lights
Your first big decision is what kind of light to use. This pretty much boils down to two camps: strobes (you might know them as flashes) and continuous lights (like the LEDs that are everywhere now).
Strobes are the heavy hitters. They fire off an incredibly bright, super-short burst of light that freezes motion like nothing else. Shooting a liquid splash? A model mid-jump? A strobe is your best friend. The catch? You can’t see what the light is doing until you press the shutter, which means there’s a bit of a learning curve.
Continuous lights, on the other hand, are pure WYSIWYG—"what you see is what you get." They stay on, so you can watch in real-time as you move the light and see exactly how the shadows fall on your product. This makes them ridiculously beginner-friendly. Modern LEDs are powerful, they don't get hot enough to cook an egg on, and many let you adjust the color temperature on the fly.
Pro Tip: If you're just starting out, grab a continuous LED light. The immediate feedback of seeing your adjustments live will fast-track your learning and help you develop an instinct for how light really works.
Modifiers: The Real Secret Sauce
Here's something the pros know that beginners often miss: the light source itself is only half the battle. The real magic happens when you start using light modifiers. These are the things you put in front of your light to shape it, soften it, or direct it.
A bare flash bulb is harsh and ugly. But pop that same flash inside a softbox, and suddenly the light is soft, beautiful, and flattering.
-
Softboxes: Your workhorse. These create a gorgeous, even light that mimics a soft window. They are perfect for minimizing gnarly shadows and creating clean, appealing highlights on just about any product you can think of.
-
Umbrellas: These throw a broader, more spread-out light than a softbox. A "shoot-through" (translucent white) umbrella gives you a wide, soft wash of light. A "bounce" umbrella (with a silver or gold inside) kicks back a punchier, more focused beam.
-
Reflectors: Don’t overthink this one. A reflector is just anything that bounces light. It could be a fancy 5-in-1 collapsible disc or, just as easily, a $2 piece of white foam board from the art store. They are absolutely essential for kicking a little light back into the shadows to show more detail.
Killer DIY Hacks for a Shoestring Budget
Don't have the cash for pro gear? No problem. Some of the most effective tools in my kit can be made for less than the cost of a fancy coffee. I'm serious.
| Professional Gear | The DIY Alternative | What It Does |
|---|---|---|
| Large Softbox ($100+) | A white bedsheet over a lamp | Creates a huge, soft light source that wraps beautifully around your product. |
| Reflector Disc ($30+) | White foam core board ($2) | Bounces light back into the shadows, softening them and revealing lost detail. |
| Negative Fill/Flag ($40+) | Black foam core board ($2) | Absorbs light to deepen shadows, adding drama and contrast where you want it. |
| Diffusion Panel ($50+) | Parchment paper or a shower curtain | Placed between your light and the product, it smooths out the light and kills ugly glare. |
Look, using DIY tools isn't a "lesser" option—it's a smart one. I still use foam core boards on big-budget shoots because they just work. Your customer will never know you used a bedsheet instead of a $300 softbox, but they will notice how amazing your products look. Start here, nail the fundamentals, and invest in the pricey stuff later as your business grows.
Alright, theory's over. Let's get our hands dirty and build some real, repeatable product photography lighting setups that actually work. This is where we stop talking and start shooting, moving past abstract ideas to create formulas you can rely on, every single time.
This whole process breaks down into a simple flow: pick your light, shape it with a modifier, and then use some clever DIY tricks to perfect the shot.
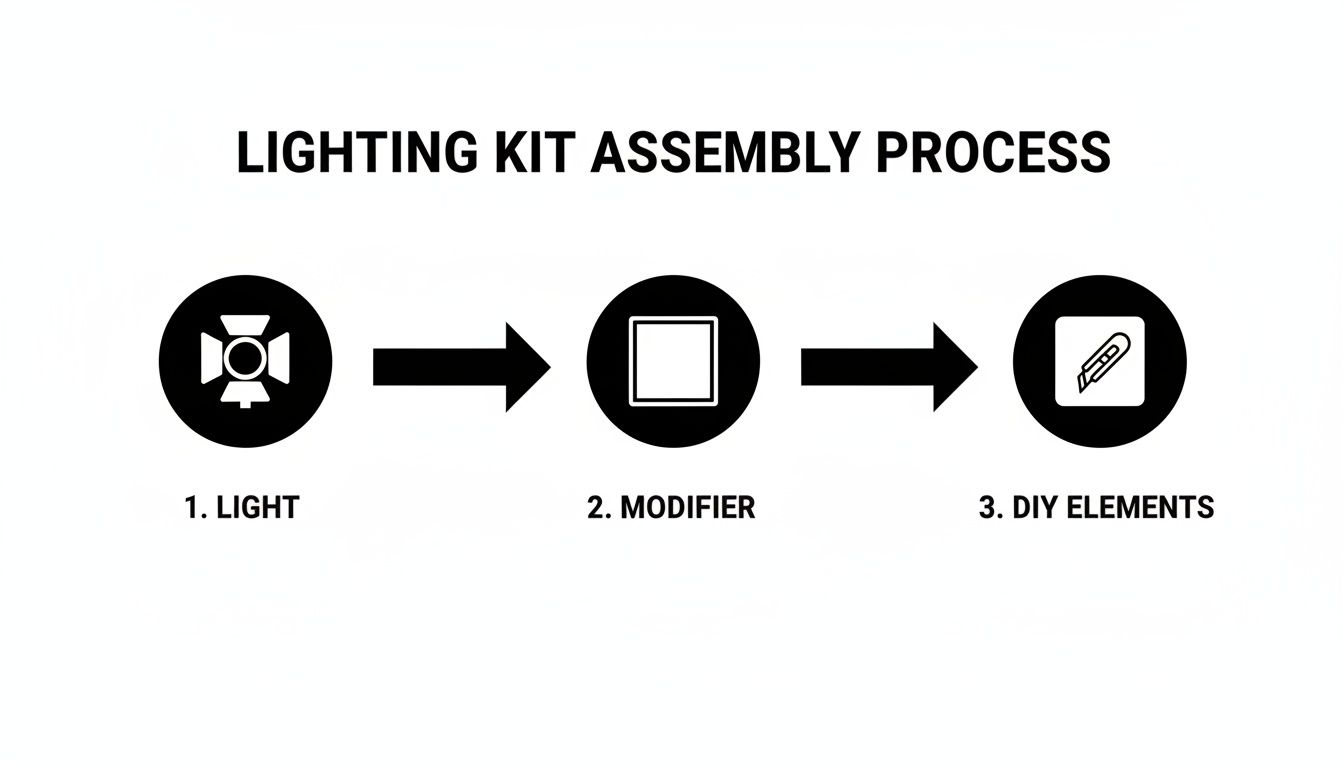
Honestly, that's the foundation for almost every professional shot you've ever admired. Light, modifier, fill. Simple, right?
One-Light Magic for Small Products
Shooting smaller items like cosmetics, electronics, or fancy soaps? You really don't need a crazy multi-strobe rig. In fact, a single light is often all it takes to create a crisp, professional image that pops off the screen.
The secret weapon here isn't a second light—it's a bounce card. A cheap piece of white foam core, placed opposite your main light, acts as a reflector. It gently kicks light back into the shadows, adding dimension without creating a flat, boring image.
- The Key Light: Set up one continuous LED or a strobe at a 45-degree angle to your product. This is what creates your main light and shadow, giving the item its shape.
- The Fill: Grab your white foam board and place it on the opposite side, just out of the camera's view. Now, just angle it until you see it toss a soft, flattering light back onto the product's dark side.
This setup is the bread and butter of e-commerce photography. It's fast, efficient, and dead simple for creating consistent, high-quality shots, especially for those clean white-background product listings.
Taming Reflections: Jewelry and Glassware
Welcome to the final boss of product photography: shiny stuff. Jewelry, glassware, and polished metals can feel impossible to shoot without getting a funhouse reflection of you, your camera, and your messy studio.
The trick is to stop thinking about lighting the product and start thinking about lighting the environment around it.
Your goal isn't to blast the item with light. Instead, you want to create huge, soft, unbroken highlights that wrap around its surface. This is where big modifiers and clever placement become your best friends.
The secret to shooting reflective objects is all about managing what they see. Don't try to kill the reflections—that just makes things look dull and fake. Your job is to control them, using them to create clean, beautiful highlights that define the product's shape.
A large softbox is pretty much non-negotiable for this. You can also get creative and build a "light tent" by surrounding the product with white diffusion material (a clean bedsheet works in a pinch!) and shining your light through it. This bathes the item in super-soft, even light, killing harsh hotspots.
Also, embrace the darkness with negative fill. By placing black foam core boards just out of the frame, you can absorb light and create clean, defining dark lines along the edges of a silver necklace or the curve of a wine glass. This adds contrast and makes the product look sharp and professional.
If you're really diving into this tricky category, our guide on jewelry product photography is packed with more specialized techniques for this very challenge.
Getting Apparel Just Right: Flat Lays and Mannequins
When you're shooting clothing, your two biggest enemies are bad texture and weird colors. Awful lighting can make a beautiful linen shirt look like a cheap polyester rag. Your setup has to show off the fabric's actual feel.
For flat lays, one huge light source placed directly overhead or slightly to one side is perfect. The key is to make that light source as large as you can relative to the clothes; this creates soft, gentle shadows that don't distract from the garment itself.
For mannequin shots, you'll get much better results with two lights:
- Main Light: Place your key light, fitted with a large softbox, at a 45-degree angle to the mannequin. This is your workhorse.
- Fill Light: On the opposite side, add a second, less powerful light (or even just a big reflector) to soften the shadows and make sure no part of the clothing gets lost in the dark.
Understanding how to light different things is a skill in itself. For example, many of the same principles apply to food, and you can learn a lot from looking at culinary photography lighting techniques. Revealing texture and color is the name of the game in both worlds.
No matter your setup, always set a custom white balance on your camera. Auto white balance gets easily confused by different fabrics and backgrounds, which is a one-way ticket to inaccurate colors—and a major reason for customer returns. Set it manually, and you guarantee that the vibrant red dress on your website actually shows up as a vibrant red dress.
To make things even easier, here's a quick cheat sheet to get you started.
Lighting Setup Cheat Sheet by Product Type
This table is your quick-start guide. Find your product type and you'll have a great baseline for your lighting configuration.
| Product Type | Recommended Lights | Key Modifier | Common Challenge |
|---|---|---|---|
| Small Items (Cosmetics, Gadgets) | 1 Key Light | Softbox + Bounce Card | Creating dimension without harsh shadows. |
| Jewelry & Glassware | 1-2 Lights | Large Softbox or Light Tent | Managing reflections and defining edges. |
| Apparel (Flat Lay) | 1 Large Overhead Light | Large Octabox or Softbox | Showing fabric texture and even lighting. |
| Apparel (Mannequin) | 2 Lights (Key & Fill) | Softboxes | Avoiding harsh shadows and ensuring color accuracy. |
Think of this as your recipe book. Start with these ingredients, and then feel free to add your own creative spice once you get the hang of it.
Solving Common Lighting Nightmares
So, you’ve got everything set up. Your fancy new light is humming, the product is sitting pretty, but the image on your camera screen looks… well, terrible. We’ve all been there. It’s that moment every photographer, from rookie to seasoned pro, knows intimately.
Don’t throw in the towel just yet. This is just the troubleshooting phase. These common lighting headaches are rites of passage, and thankfully, each one has a pretty straightforward fix. Think of this as your emergency guide for turning those lighting frustrations into photos that actually sell.
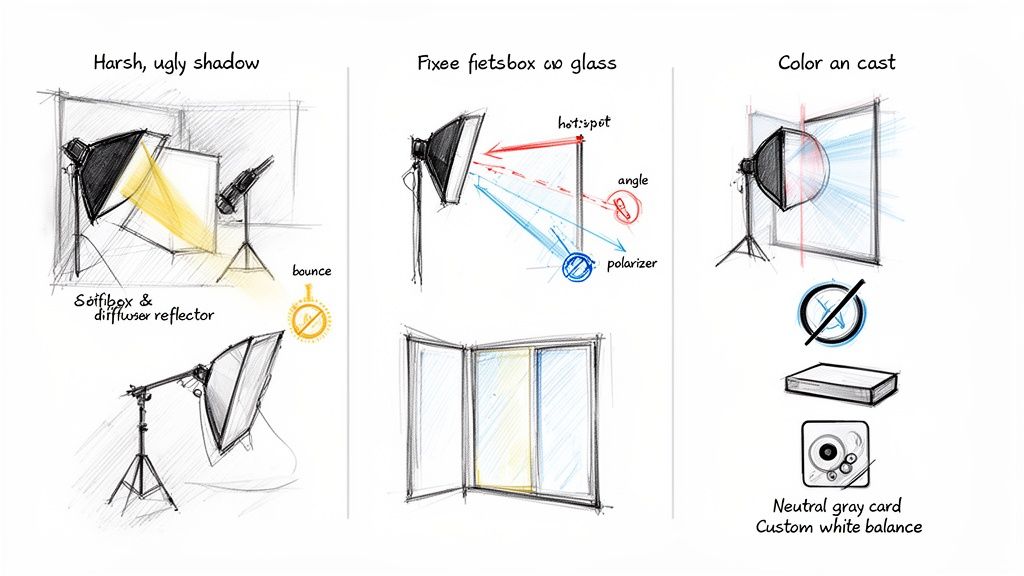
Taming Those Harsh, Ugly Shadows
You know the ones. Those dark, hard-edged shadows that look like they were cut out with safety scissors. They scream “amateur hour” and completely distract from your product, hiding key details and just looking cheap. This disaster is usually caused by a light source that’s too small and too direct.
The cure? Diffusion. It’s all about making your light source bigger and softer.
- Get Closer: It sounds backward, I know, but moving your light closer to the product actually makes it a larger, softer source relative to the subject.
- Grab a Softbox or Umbrella: This is the pro’s go-to fix. A softbox grabs your small, angry light and transforms it into a big, beautiful window of soft light. The result? Those harsh shadows melt away instantly.
- DIY It: No softbox? No sweat. Just hang a white, translucent sheet between your light and the product. A clean bedsheet, a white shower curtain, or even some baking parchment paper can do wonders in a pinch.
By softening that light, you create a gentle, pleasing gradient from light to dark that looks infinitely more professional.
Fighting the Glare on Shiny Stuff
You’re shooting a glass bottle, a shiny new watch, or a sleek phone, and all you can see in the photo is a blinding white spot—a tiny, distorted reflection of your lightbulb. This is the arch-nemesis of anyone shooting reflective products. It’s distracting, ugly, and makes the item look tacky.
The secret here is all about tweaking the angle and size of your light. You don’t want to kill the reflection entirely; you want to control it, turning it into a large, clean highlight that actually defines the product’s shape.
The real trick to shooting reflective items isn’t eliminating highlights, it’s managing them. Your goal is to create big, clean, flattering reflections, not tiny, distracting ones. That means making your light source as big as you possibly can.
Here’s how to win this fight:
- Go Big or Go Home: Use the largest softbox you’ve got. The bigger the light source, the bigger and smoother the reflection will be. A massive highlight looks intentional and high-end.
- Shift Your Angle: Move that light around! Sometimes, nudging it a few inches to the side or raising it a foot higher is all it takes to slide that ugly hotspot off the product or morph it into a beautiful, shape-defining highlight.
- The Secret Weapon: A Polarizing Filter: A circular polarizing filter (CPL) is a game-changer. Just like your polarized sunglasses cut glare on a sunny day, a CPL can slice through reflections on non-metallic surfaces like glass and plastic, leaving you with a much cleaner shot.
When Your Colors Are Just… Off
You’re trying to capture a beautiful navy blue sweater, but on camera, it looks vaguely purple. Or your crisp white background has a funky yellow or blue tint. That’s a color cast, and it’s almost always caused by a wonky white balance setting.
Your camera does its best to guess what “white” is supposed to look like in a scene, but under artificial lights, it often gets confused.
- Set a Custom White Balance: This is the most bulletproof solution. Nearly every modern camera lets you take a quick photo of something neutral—like a gray card or even a simple piece of white paper—to tell it, “Hey, this is what true neutral looks like.” Once you do that, your colors will pop with perfect accuracy.
- Keep Your Lights Consistent: If you’re using more than one light, make sure they’re the same type. Mixing an old tungsten bulb with a modern LED is a recipe for a color temperature disaster that’s a nightmare to fix in post-production.
Mastering these quick fixes is what separates the pros from everyone else. It’s not just about knowing how to set up the lights, but knowing how to think on your feet and adjust when things inevitably go wrong.
The Final Polish With Post-Production and AI
Getting the shot is a huge victory, but let’s be real—that’s not the finish line. Even with a flawless product photography lighting setup, the raw image straight from your camera is just a fantastic starting point. The real magic, the secret sauce that makes an image truly ready for prime time, happens in post-production.
For anyone juggling hundreds or thousands of products, the editing workflow can become a soul-crushing bottleneck. Manually cleaning up tiny dust specks, tweaking the exposure, and—everyone’s favorite—removing backgrounds can eat up way more time than the photoshoot itself. This is where a smart, efficient process isn’t just a nice-to-have; it’s a matter of survival.
Think of post-production as your final quality control. It’s your last chance to make sure every single image hits your brand standards, from dead-on color accuracy to the perfect brightness. This is where you transform a great photo into a killer asset, ready for any e-commerce platform, social feed, or marketing campaign you throw at it.
Automating the Grind with AI
This is where the game completely changes. Instead of chaining yourself to an editing suite and clicking on pixels for hours on end, you can hand off nearly the entire polishing process to an automated system. Imagine dropping a folder of your raw product shots and, moments later, getting back perfectly clean images with crisp, transparent backgrounds.
This isn’t some far-off sci-fi fantasy; it’s the power of an API-driven workflow. Tools like PixelPanda are built specifically to tackle the most tedious parts of product photo editing, freeing you up to focus on the more creative, high-value parts of your job.
Let’s walk through a real-world scenario. You’ve just wrapped a shoot for 50 new products against a clean white backdrop. The lighting was great, but there are still those tiny imperfections that drive you crazy:
- The background isn’t a pure, perfect white (#FFFFFF).
- A few nearly invisible dust particles managed to land on a product.
- The shadows look good but could be more consistent across the entire product line.
Instead of cracking open all 50 files one by one, you can run a simple script that sends them all to an AI processing service.
Post-production isn’t about fixing mistakes; it’s about elevating excellence. A perfect lighting setup gets you 90% of the way there, but a smart, automated workflow is what delivers that final 10% of polish at scale.
A Practical Workflow Example
Getting this set up is surprisingly straightforward. Your developer can integrate an API that automates these steps, turning what used to be a full day of editing into a 15-minute coffee break. The workflow looks something like this:
- Batch Upload: All your raw images from the shoot get uploaded to a specific folder or sent directly through the API.
- AI Background Removalixelpanda.ai/free-tools/background-remover”>Background Removal: The API intelligently finds the product and slices out the background with insane precision—even around tricky details like fur or intricate edges. You get back a clean PNG file with a transparent background.
- Smart Enhancement: This goes way beyond just background removal. The AI can automatically apply subtle enhancements, like minor color corrections for brand consistency or generating intelligent shadows to give the product a natural, grounded look when you place it on a new background.
- Final Delivery: The finished, ready-to-use images are sent right back to your system, perfectly prepped for your listings on Shopify, Amazon, or your own website.
This kind of automated pipeline completely transforms your production capacity. Suddenly, you can shoot and process hundreds of products a week without having to scale your editing team or sacrifice an ounce of quality. It’s how modern e-commerce brands maintain an impossibly high standard of visual excellence while moving at the speed of the market.
To see what’s possible, you can explore what you can do with AI product photos and figure out how this tech can slot into your specific needs. This approach ensures that all the hard work you put into your product photography lighting setup translates directly to stunning, consistent results online, every single time.
Your Product Photography Lighting Questions Answered
Alright, we’ve covered a ton of ground on building the perfect product photography lighting setup. But I know how it is—even after all that, a few “what if” questions are probably still rattling around in your brain. Let’s tackle some of the most common ones I hear and get you over that final hurdle.
This is your go-to troubleshooting guide. No fluff, just straight-to-the-point answers to get you shooting with confidence.
Can I Really Get Pro Results With Just One Light?
You absolutely can. In fact, starting with a single light is one of the best things you can do. It forces you to learn how to shape light, which is the whole game. The real magic isn’t in how many strobes you have, but in how creatively you use the one you’ve got. And your secret weapon? A simple reflector.
Seriously, a cheap piece of white foam board from a craft store works wonders.
By teaming up a single light with a reflector, you’re essentially faking a classic two-light setup. Here’s how it works:
- Place your main light (your “key light”) at about a 45-degree angle to whatever you’re shooting. This is what creates your primary light and gives the product its shape with shadows.
- Now, bring in that reflector on the opposite side. Its whole job is to catch the light spilling from your key and bounce it back into the shadows, softening them up and bringing out more detail.
This simple technique is a workhorse for a reason. It’s fast, it’s efficient, and it creates beautifully sculpted light for everything from skincare bottles to handmade wallets.
Which Matters More: My Camera or My Lighting?
Lighting. Full stop. If you take one thing away from this guide, let it be this.
A brand-new, top-of-the-line camera in a badly lit room will give you a garbage photo. Every single time. On the flip side, an amazing lighting setup can make photos from a ten-year-old DSLR—or even your iPhone—look like they belong in a magazine.
Light is what creates shape, reveals texture, and sets the mood. It does all the heavy lifting. Your camera just records what the light is doing.
I’ll put it this way: spending $150 on a decent LED light and a softbox will have a monumentally bigger impact on your photos than dropping $1,500 on a new camera body. Master light first, and your current gear will suddenly feel way more powerful.
How Do I Avoid Those Awful Reflections on Shiny Products?
Ah, welcome to the final boss of product photography. Shooting reflective stuff like jewelry, chrome, or glass can be a nightmare. The secret is to stop thinking about lighting the product and start thinking about lighting the environment around it.
Your goal isn’t to kill reflections but to control what’s being reflected. You want to see big, soft, clean highlights, not a dozen tiny, distracting hotspots from every light in the room.
- Go big with your light source. A huge softbox or a diffusion panel is your best friend. The bigger the light source, the smoother and more flattering the reflection will be.
- Use negative fill. This is a pro move. Grab some black foam boards and place them just out of frame. They won’t reflect light; they’ll absorb it. This creates clean, dark lines that define the edges of your product and add that sharp, high-end contrast.
- Get a polarizing filter. A circular polarizing filter (CPL) that screws onto your lens can be a lifesaver. It works like a pair of fancy sunglasses for your camera, cutting down glare on non-metallic surfaces with a simple twist.
When you learn to manage reflections instead of fighting them, you can actually use them to sculpt your product with beautiful, intentional light.
Ready to take the final step and put your post-production on autopilot? Let PixelPanda handle the tedious background removals and image cleanup so you can stay focused on the creative part. Try PixelPanda for free and see how AI can polish the amazing shots from your new lighting setup.