Why Your Product Photography Lighting Setup Makes or Breaks Sales

The difference between a product that sells and one that languishes in your inventory often comes down to a single factor: lighting. When shoppers can’t physically touch or examine your products, your product photography lighting setup becomes the primary tool for building trust and driving conversions. Poor lighting creates shadows that hide details, generates unflattering color casts, and makes even premium products look cheap.
Research from the Baymard Institute reveals that 56% of online shoppers cite product images as the most important factor in their purchasing decision—more influential than reviews, descriptions, or price. Yet most e-commerce sellers invest hundreds or thousands in inventory while shooting products with whatever light happens to be available in their spare room.
The good news? You don’t need a $10,000 studio to create professional product photos. With the right product photography lighting setup—one that costs under $500—you can match or exceed the quality of images from brands spending 10x more. The secret lies in understanding light behavior, not owning expensive equipment.
Before diving into specific setups, let’s address a critical point: lighting isn’t just about brightness. It’s about control. Professional product photographers manipulate light direction, intensity, and quality to reveal texture, minimize unwanted reflections, and create dimension. Once you understand these principles, even budget equipment becomes powerful.
Key Takeaway
Investing in proper lighting delivers higher ROI than any other aspect of product photography—better than cameras, lenses, or backdrops.
The ROI of Professional Product Photography Lighting
According to 2026 e-commerce analytics, brands that upgraded to professional product photography lighting setups saw average conversion rate increases of 47% within three months. Amazon sellers report that optimized product images can improve click-through rates by up to 35%, directly impacting sales velocity and organic ranking.
The cost-benefit analysis is compelling: a $400 lighting setup can pay for itself with just 15-20 additional sales for most products. Compare this to other marketing investments—paid ads, influencer partnerships, or SEO optimization—and lighting upgrades offer the most predictable ROI.
How Lighting Affects Consumer Psychology
Modern consumer behavior research reveals that lighting quality subconsciously influences purchase decisions. Harsh shadows and poor color accuracy trigger uncertainty, while professional lighting creates trust and perceived value. Studies from Stanford’s Consumer Psychology Lab show that products photographed with professional product photography lighting setups are perceived as 23% higher quality, even when the actual product is identical.
This perception gap matters enormously in competitive markets. When customers compare your products to competitors with professional photography, poor lighting immediately signals lower quality—regardless of your actual product superiority.
Essential Gear for a Professional Product Photography Lighting Setup
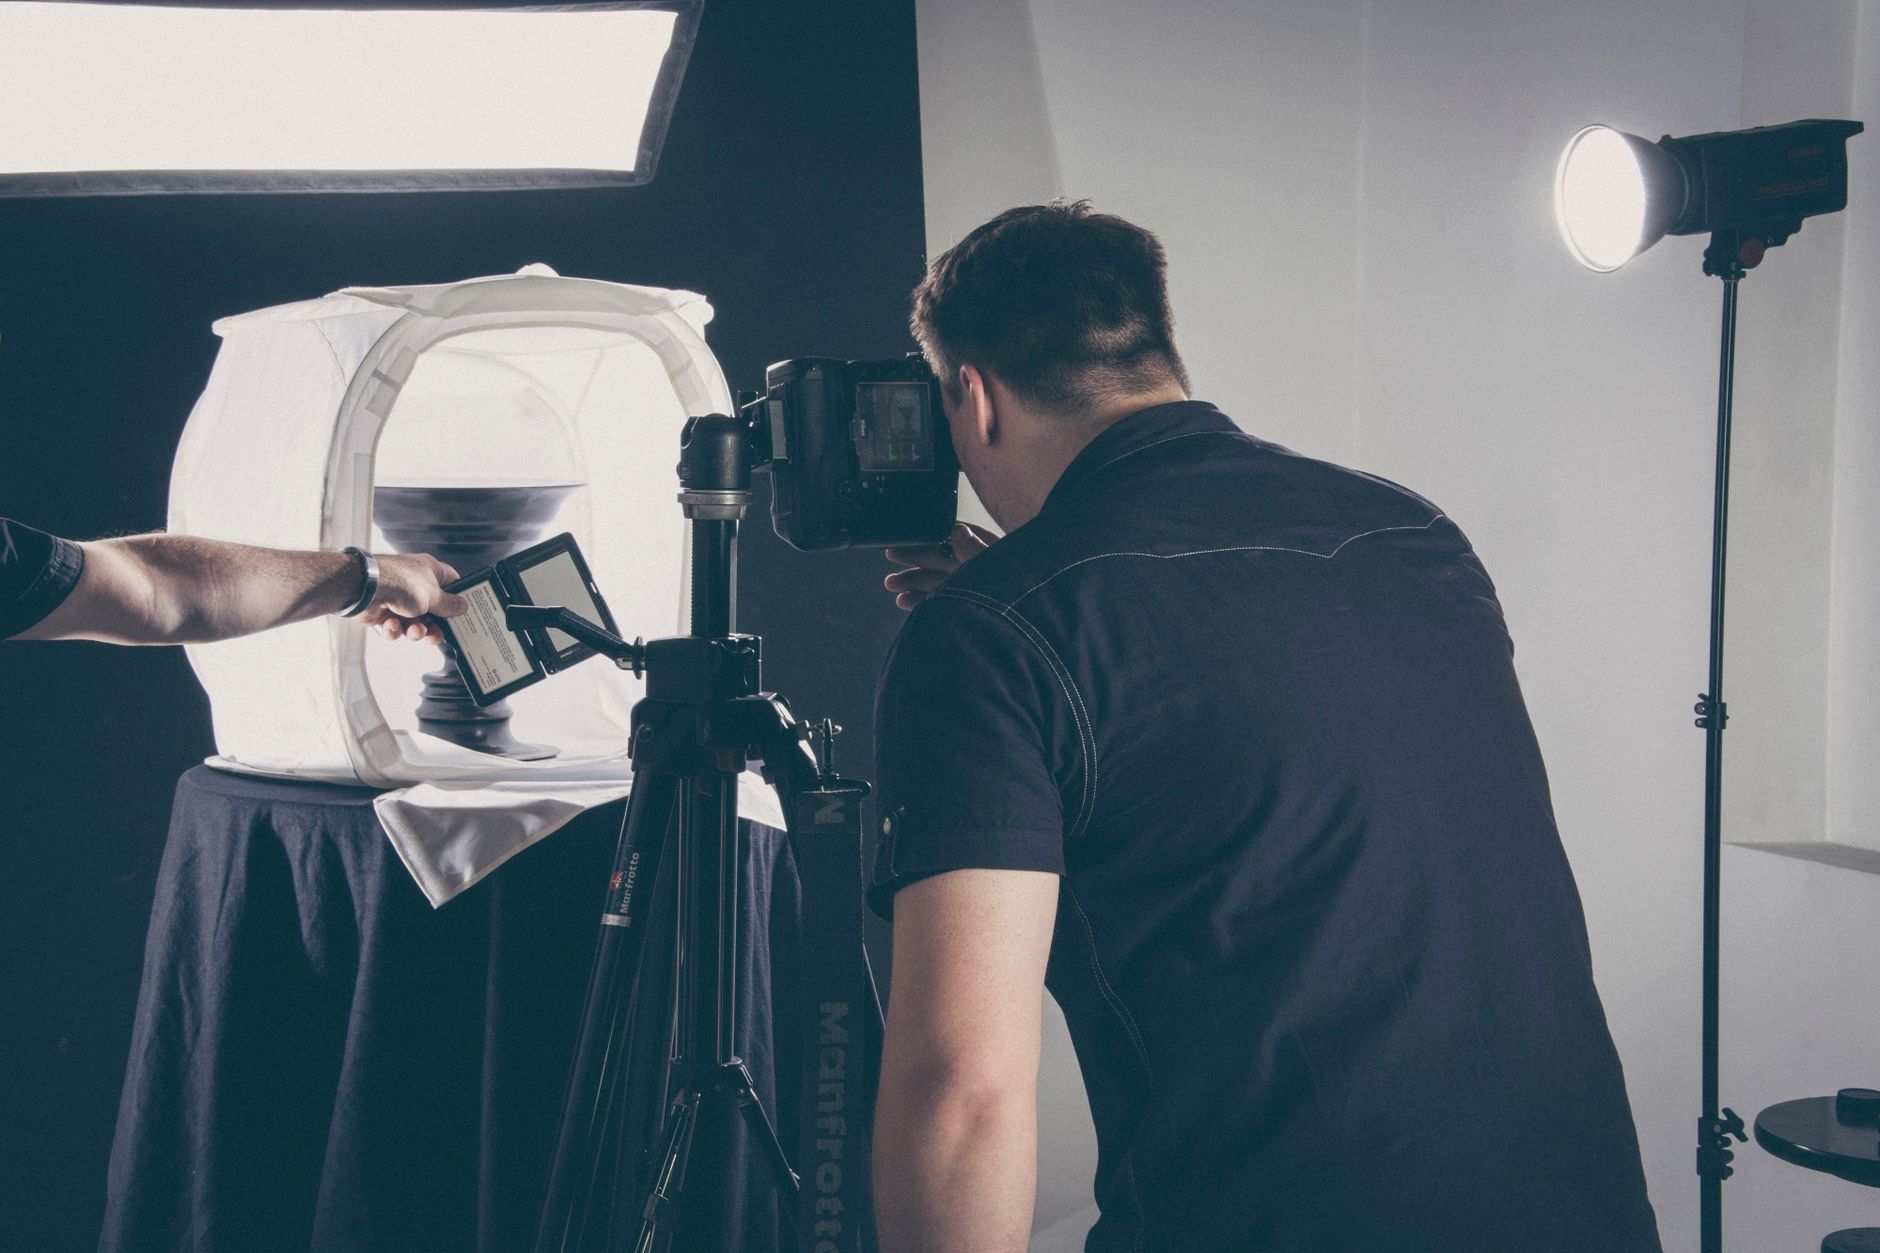
Building an effective product photography lighting setup requires understanding the core components and how they work together. While you can start with natural window light and reflectors, consistent results demand controlled artificial lighting. Here’s what you actually need versus what marketing tells you to buy.
Light Sources: LED vs Strobe in 2026
The lighting landscape has evolved dramatically in recent years. In 2026, LED panels dominate product photography thanks to improved color accuracy, reduced power consumption, and integrated smart controls. Unlike strobes, LED lights show you exactly what you’ll capture, making them perfect for beginners and efficient workflows.
Modern LED panels offer bi-color temperature control (2700K-6500K), smartphone app integration, and color accuracy ratings (CRI) above 95%. Brands like Godox, Aputure, and Neewer now produce studio-quality LED panels under $200 that outperform $800 strobes from just five years ago.
Key specifications to prioritize:
- High CRI Rating (95+): Ensures accurate color reproduction
- Bi-Color Capability: Adjust between warm and cool tones
- Minimum 30W Output: Provides sufficient power for most products
- Flicker-Free Operation: Essential for video content creation
- Wireless Control: Adjust multiple lights simultaneously
Light Modifiers That Transform Your Product Photography Lighting Setup
Raw light sources create harsh shadows and unflattering highlights. Light modifiers shape and soften light to reveal product details beautifully. Understanding which modifiers solve specific problems saves time and money.
| Modifier Type | Best For | Effect | Cost Range |
|---|---|---|---|
| Softbox (24″x24″) | General products, electronics | Soft, even illumination | $40-$80 |
| Strip Softbox | Tall products, bottles | Directional soft light | $30-$60 |
| Beauty Dish | Cosmetics, jewelry | Contrast with soft shadows | $60-$120 |
| Reflector Set | All product types | Fill shadows, add highlights | $20-$50 |
| Diffusion Panels | Reflective products | Eliminates harsh reflections | $25-$70 |
Many beginners waste money on specialty modifiers like snoots, grids, and barn doors. Start with softboxes and reflectors—they solve 95% of lighting challenges in product photography. Once you master these basics, specialty modifiers become tools for creative enhancement rather than problem-solving necessities.
Smart Support Systems for Modern Product Photography Lighting Setups
Traditional light stands work, but modern wireless stands with smartphone control streamline workflows significantly. Pneumatic stands prevent sudden drops that damage equipment, while C-stands offer unmatched versatility for complex setups.
For 2026 workflows, consider stands with integrated cable management and quick-release mechanisms. The extra cost pays for itself through time savings and reduced setup complexity. Professional photographers report 40% faster setup times with quality support equipment.
Essential Accessories That Most Guides Skip
Beyond lights and modifiers, several accessories dramatically improve your product photography lighting setup results:
- Color Checker Cards: Ensure accurate color reproduction across different lighting conditions
- Light Meters (Smartphone Apps): Modern apps like Lux Light Meter provide professional accuracy
- Wireless Remote Triggers: Control multiple lights simultaneously
- Gaffer Tape: Secure cables and position small reflectors
- Lens Cleaning Kit: Keep your camera equipment spotless
Key Takeaway
The quality of your light modifiers matters more than the power of your lights—a $50 light with a good softbox beats a $300 bare bulb every time.
The Three-Point Product Photography Lighting Setup That Works for 90% of Products
Three-point lighting is the foundation of professional product photography lighting setups. Originally developed for portrait and video work, this technique adapts perfectly to product photography by creating dimension, controlling shadows, and highlighting important features. Master this setup, and you’ll handle 90% of product photography challenges with confidence.
Understanding the Three Lights in Product Photography Context
The three-point lighting system uses a key light, fill light, and back light working together to create depth and visual interest. Here’s how each functions specifically for product photography lighting setups:
Your primary light source, positioned 30-45 degrees from the camera axis. This creates the main illumination and establishes the shadow pattern that gives your product dimension. For most products, place this light slightly above the product level.
Positioned opposite the key light at lower intensity (typically 50% of key light power). Softens shadows without eliminating them completely, revealing detail in darker areas. Can be a reflector instead of an active light source.
Placed behind and above the product, pointing toward the camera. Creates a subtle highlight along the product edges, separating it from the background and adding depth. Essential for dark products on dark backgrounds.
Adapting Three-Point Lighting for Different Product Categories
While the basic principle remains constant, you’ll adjust the ratio between lights based on what you’re shooting. Understanding these variations transforms your product photography lighting setup from generic to product-specific:
Matte Products (Ceramics, Textiles, Books): Use a 2:1 key-to-fill ratio with a soft back light. These surfaces don’t create problematic reflections, so even lighting reveals texture beautifully.
Reflective Products (Electronics, Jewelry, Glass): Increase to a 4:1 ratio and use larger light sources to control reflections. The back light becomes crucial for separating the product from its background.
Flat Products (Artwork, Clothing Laid Flat, Documents): Replace the traditional three-point setup with “clamshell lighting”—two identical lights at 45-degree angles. This eliminates shadows while maintaining enough directionality to show texture.
Step-by-Step Three-Point Product Photography Lighting Setup
Follow this systematic approach to achieve professional results every time:
- Position Your Product: Place it on your shooting surface at eye level with your camera
- Set the Key Light: Position at 45 degrees to the right or left, slightly above product level
- Check Your Shadows: Take a test shot—shadows should be distinct but not harsh
- Add Fill Light: Position opposite the key light at half the intensity
- Balance the Fill: Adjust until shadows show detail without losing dimension
- Position Back Light: Place behind product, pointing toward camera lens
- Fine-tune Edge Definition: Adjust back light intensity until product separates cleanly from background
Common Three-Point Lighting Adjustments for Specific Challenges
Real-world product photography presents situations that require modifications to standard three-point lighting:
Highly Reflective Surfaces: Replace direct back light with a large diffusion panel behind the product. This creates even background illumination without unwanted reflections.
Transparent Products: Use back light as your key light, shooting through the product. Add side lighting for rim definition.
Products with Deep Recesses: Add a fourth light (top light) to illuminate internal areas that shadows would otherwise hide.
“The three-point lighting system isn’t a rigid formula—it’s a framework for thinking about light. Once you understand why each light exists, you can modify the setup for any product challenge.”
— Michael Chen, Commercial Product Photographer
Three Complete Product Photography Lighting Setups Under $500
After testing dozens of lighting combinations with e-commerce sellers, these three product photography lighting setup configurations deliver professional results without breaking your budget. Each targets different business needs and experience levels.
Setup #1: The Starter Kit ($199)
Perfect for beginners or businesses shooting lightweight products under 2 pounds. This product photography lighting setup focuses on simplicity and immediate results.
Equipment List:
- Neewer 18″ LED Ring Light with Stand – $89
- 5-in-1 Reflector Set (43″) – $25
- White Seamless Paper Backdrop – $15
- Extension Cord and Cable Management – $20
- Smartphone Tripod with Remote – $50
Total: $199
This setup works excellently for jewelry, cosmetics, small electronics, and crafts. The ring light provides even, shadowless illumination perfect for detail-rich products. Position products 2-3 feet from the ring light and use reflectors to add highlights or fill shadows as needed.
Pros: Extremely easy setup, great for detail shots, works with smartphones and cameras
Cons: Limited to smaller products, less creative lighting control
Setup #2: The Versatile Studio ($349)
The sweet spot for most e-commerce sellers. This product photography lighting setup handles products from small accessories to medium-sized items (up to 20 pounds) with professional flexibility.
Equipment List:
- Godox SL-60W LED Video Light (x2) – $180
- 24″x24″ Softboxes (x2) – $60
- Light Stands 7ft (x2) – $50
- 32″ 5-in-1 Reflector – $20
- White/Gray Backdrop Stand Kit – $39
Total: $349
This configuration gives you complete control over a professional three-point lighting setup. The bi-color LED panels adapt to any shooting scenario, while the softboxes provide beautiful, even illumination. You can shoot everything from apparel to furniture accessories with this kit.
Setup tip: Position one light as your key light at 45 degrees, use the second as fill light at 50% power, and employ reflectors for rim lighting effects. This approach maximizes your lighting equipment efficiency.
Pros: Professional results, handles most product sizes, great color accuracy
Cons: Requires more setup time, learning curve for light positioning
Setup #3: The Content Creator Pro ($485)
For sellers creating both photos and videos, this advanced product photography lighting setup includes smart features and maximum versatility. Ideal for businesses ready to scale their visual content production.
Equipment List:
- Aputure Amaran 100d LED Light (x2) – $270
- Aputure Light Dome Mini (x2) – $80
- C-Stands with Arms (x2) – $90
- Lastolite TriGrip Reflector Kit – $45
Total: $485
This premium setup offers smartphone app control, precise color temperature adjustment, and studio-grade build quality. The Light Dome Mini softboxes create incredibly soft, wrap-around lighting perfect for high-end product photography. C-stands provide rock-solid positioning that won’t drift during long shooting sessions.
The Amaran lights integrate with the Sidus Link app, allowing you to control both lights simultaneously from your phone. Adjust brightness, color temperature, and even create lighting presets for different product types.
Pros: Professional studio quality, wireless control, excellent build quality
Cons: Higher learning curve, more expensive accessories
Choosing the Right Setup for Your Business
Your ideal product photography lighting setup depends on three key factors:
- Product Size Range: Smaller products work fine with setup #1, while larger items need the power and flexibility of setups #2 or #3
- Volume Requirements: High-volume sellers benefit from the efficiency features in setup #3
- Content Types: If you create video content alongside photos, invest in setup #3 for optimal versatility
Remember: you can always start with a basic setup and upgrade components over time. Many successful e-commerce sellers began with setup #1 and gradually expanded their lighting arsenal as their business grew.
Integrating AI Tools with Your Product Photography Lighting Setup
Modern AI tools can dramatically enhance your product photography workflow, even with budget lighting setups. While proper lighting remains irreplaceable, AI post-processing tools can help you achieve consistent, professional results faster than traditional editing methods.
AI Background Removal for Faster Product Photography
Even with perfect product photography lighting setups, background removal often consumes significant post-production time. AI-powered tools like the AI Background Remover can instantly isolate products photographed against simple backdrops, freeing up time for actual photography.
Best practices for AI background removal:
- Shoot against contrasting backgrounds (white products on dark backgrounds, dark products on white)
- Ensure clean lighting separation between product and background
- Use your back light strategically to create edge definition
- Maintain consistent lighting quality—AI tools work best with properly lit source images
Enhancing Product Photos with AI Upscaling
Budget cameras and smartphones can produce excellent results with proper lighting, but may lack the resolution for large marketplace displays. The AI Image Upscaler can increase image resolution while preserving detail quality, allowing you to compete with higher-end camera setups.
This proves especially valuable for detail shots where customers need to examine texture, materials, or craftsmanship. Your product photography lighting setup reveals the details, while AI upscaling ensures they remain crisp at any display size.
AI Product Photography for Supplementary Angles
While your core product photography lighting setup handles hero shots and primary angles, AI Product Photography can generate additional lifestyle contexts or demonstrate products in different settings. This hybrid approach maximizes your lighting investment while expanding your visual content library.
Consider this workflow: use your physical lighting setup for detailed product shots that showcase quality and craftsmanship, then use AI to place those products in various lifestyle contexts that would be expensive or impractical to photograph traditionally.
5 Common Product Photography Lighting Setup Mistakes That Kill Sales
After analyzing thousands of e-commerce product photos, certain lighting mistakes appear repeatedly—even from sellers who invested in quality equipment. Avoiding these pitfalls immediately improves your results, regardless of your product photography lighting setup budget.
Mistake #1: Ignoring Color Temperature Consistency
Mixed lighting sources create color casts that make products look unnatural. This happens when sellers combine window light (5500K) with standard LED bulbs (3000K) or use lights with different color temperatures in the same setup.
The fix is simple but crucial: ensure all lights in your product photography lighting setup match color temperature within 200K. Modern LED panels offer precise color temperature control, making this easier than ever. Always check your camera’s white balance settings to match your lighting choice.
Warning
Color inconsistencies between product photos signal poor quality to customers, even if your actual products are premium.
Mistake #2: Overlighting That Eliminates All Shadows
Beginners often assume “more light equals better photos,” leading to flat, dimensionless images. Shadows provide depth and help customers understand product shape and texture. The goal of any product photography lighting setup isn’t to eliminate shadows but to control them.
Aim for a lighting ratio where shadows retain detail without being overly dark. A good test: you should be able to see detail in the darkest shadows of your product photo. If shadows appear completely black, add fill light gradually until detail emerges.
Mistake #3: Inconsistent Lighting Between Product Photos
Nothing destroys brand credibility faster than product photos with different lighting qualities. Customers notice when some products appear warm and others cool, or when shadow patterns vary dramatically across your catalog.
Create a lighting diagram for your standard product photography lighting setup and stick to it. Mark light positions with tape on your floor, document power settings, and maintain the same backdrop distance. Consistency builds trust and makes your brand appear more professional.
Mistake #4: Neglecting Reflective Surface Management
Shiny products—electronics, jewelry, cosmetics packaging—require special attention in any product photography lighting setup. Untreated, these surfaces become mirrors that reflect your lights, room, and even you as the photographer.
Solutions include:
- Using larger light sources (bigger softboxes) to create pleasant reflections
- Positioning lights at angles that reflect the backdrop, not the room
- Adding diffusion panels between lights and reflective products
- Using matte surfaces adjacent to products to prevent unwanted reflections