Removing an image background is surprisingly straightforward. You can either let an AI tool like PixelPanda do the heavy lifting for you instantly, or you can roll up your sleeves and get surgical with a program like Photoshop for maximum control. Either way, you'll end up with a professional-looking transparent PNG in just a few clicks.
So, Why Is This Your New Secret Weapon?
Before we dive into the "how," let's talk about the "why." This one skill is a total game-changer, and I'm not exaggerating. A clean, background-free image is often the only thing separating a product that gets ignored from one that pops right off the screen.
It’s about taking an ordinary photo and giving it unlimited potential. You're not just deleting pixels; you're unlocking creative freedom and giving your work a polished, professional edge that makes people stop and look. For anyone who touches visual content, this is less of a neat trick and more of a must-have skill.
For E-commerce and Marketing, It's Everything
If you're running an online store, this is non-negotiable. Crisp, consistent product shots against a clean background just scream professionalism and build trust. This consistency helps your customers focus on what matters—the product—without any distracting clutter. When every item in your catalog is presented this way, your whole brand just looks more buttoned-up.
Marketers are doing this all day, every day. A logo, a headshot, or a product photo with its background zapped can be dropped onto any social media graphic, banner, or presentation without looking out of place. That kind of flexibility is gold for keeping a brand looking sharp and consistent everywhere.
Fueling Creativity and Code
Outside of the business world, removing backgrounds is what lets creativity run wild. It's how graphic designers build stunning composites, layering isolated elements to create entirely new worlds from scratch. Even app developers need this for building clean user interfaces or features where a user's uploaded photo needs to fit in seamlessly.
The ability to lift a subject out of its surroundings is step one in visual storytelling. It gives you the power to control the narrative, placing your subject against any backdrop you can dream up.
The demand for this skill has absolutely exploded. The image background remover market was valued at a cool USD 1.38 billion and is on track to hit USD 2.38 billion by 2032. This boom is tied directly to the needs of e-commerce pros who know clean photos drive sales and developers who rely on APIs to process images in bulk. You can get the full scoop on this trend in this market intelligence report.
The Instant Fix: AI Background Removers to the Rescue
Let's be honest, who has the time to meticulously trace around an image with Photoshop's Pen Tool? When you need a clean cutout, like, yesterday, AI-powered tools are an absolute game-changer. This is the one-click magic we've all been waiting for—transforming a cluttered photo into a professional-looking asset in seconds flat.
You just upload your image, and a smart algorithm gets to work. It instantly figures out what the subject is—a person, a product, a poodle—and surgically removes everything else. No fuss, no tedious clicking, just a shockingly good result, fast.
So, How Does This AI Sorcery Work?
The whole process is beautifully simple. With a tool like PixelPanda, you’re basically just uploading a file and then downloading the finished transparent PNG. That’s it. This workflow is built for speed, making it perfect for anyone from e-commerce store owners to social media managers who need to move quickly.
Just take a look at the PixelPanda interface. It’s all about dragging and dropping your image to get the ball rolling.
The layout is clean and intuitive. There are no confusing menus or a million settings to tweak—just a clear path from A to B. This straightforward approach is what makes AI removers so incredibly useful for everyday tasks.
Of course, what’s happening on the back end is anything but simple. These systems have chewed through millions of images to learn the subtle difference between a wisp of hair and the wallpaper behind it. To get a better sense of how these systems are changing creative workflows, it's worth reading up on the Artificial Intelligence technologies that make it all possible.
Moving Beyond Single Edits with an API
One-click tools are fantastic for knocking out a photo or two, but their real muscle shows when you need to work at scale. For businesses and developers, an API from a service like PixelPanda can automate the entire background removal process. Think about an online store where every new product photo is automatically prepped with a transparent background before it even lands in the catalog.
This is how modern e-commerce and media companies keep up. The background removal software market is on track to hit USD 500 million by 2025, growing at an impressive 15% CAGR. This explosion is fueled by platforms trying to handle the 95 million photos uploaded to social media every single day. AI is crushing processing time by 90% and hitting 99% accuracy, helping online retailers see a 20-25% bump in engagement with their clean, crisp product shots. You can dig into the numbers in this background removal market research.
The Ultimate Test: Conquering Hair and Fur
Anyone who's ever tried to manually cut out a portrait knows the soul-crushing agony of dealing with hair. Those fine, frizzy, flyaway strands are a complete nightmare to isolate with traditional tools. This is where a good AI tool doesn't just compete—it completely laps the old way of doing things.
Because these AI models have learned from an enormous library of images, they can nail a level of precision on complex edges that would take a human editor a painful amount of time to even attempt.
- Frizzy Hair: It intelligently isolates individual strands, avoiding that clunky "helmet head" look.
- Fuzzy Sweaters: The soft texture of a knit fabric is preserved without creating harsh, unnatural outlines.
- Sheer Fabrics: Objects like veils or glassware are handled with finesse, maintaining their delicate, see-through quality.
The real magic isn't just about deleting the background; it's about flawlessly preserving the tiny, intricate details of your subject. That razor-sharp edge quality is what separates a professional cutout from an obvious, amateurish one.
Curious to see it for yourself? The best way to judge the quality is to throw one of your own tricky photos at it. Head over to this interactive background removal demo and see how it handles the details. For the vast majority of tasks, the speed and precision of AI make it the undisputed champ for getting rid of a background without all the drama.
Manual Removal for Pixel-Perfect Control
Look, AI is fantastic for speed. It can get you 95% of the way there in a flash. But what about that last, stubborn 5%? For those times when "good enough" just won't cut it, we need to roll up our sleeves and get our hands dirty. This is where the real craft comes in, using powerhouse tools like Photoshop or its free cousin, GIMP.
This is for the perfectionists. The artists. The ones who obsess over every pixel. It's not about speed; it's about getting it exactly right and creating a final image that can stand up to scrutiny.
Why Go Manual in an AI World?
Opting for manual background removal isn’t about being a Luddite; it’s a strategic choice. You’re trading instant gratification for absolute, unyielding control, which is non-negotiable for high-stakes projects.
Think about these scenarios where a human touch is the only way to go:
- Complex Compositions: Imagine trying to isolate overlapping glass objects or intricate lace. An AI will likely get confused, but you can make the nuanced decisions needed.
- High-End Product Photography: For things like jewelry with tiny, reflective facets or shiny surfaces, an algorithm can easily mistake a reflection for a background.
- Artistic Composites: When you're blending elements into a fantasy scene, the transition has to be seamless and artistically driven, not just technically correct.
Going manual is a commitment to quality over speed. It's for those moments when you're the artist, not just the operator, and the final image has to perfectly match your vision.
You get to make judgment calls an algorithm simply can't. You can decide to keep a subtle reflection on a wine bottle or feather a shadow just so, making it look completely natural against a new backdrop.
This is the typical three-stage AI workflow in a nutshell.

While the AI process is built for efficiency, the manual route adds crucial steps where your expertise makes all the difference.
Mastering Non-Destructive Layer Masks
If you take away only one thing from this section, let it be this: use layer masks. Forget the Eraser tool exists. Using the eraser is like performing surgery with a sledgehammer—it's permanent and messy.
Layer masks are the pro move. They're a non-destructive way to hide parts of an image without deleting a single pixel. Think of it like laying a special sheet of paper over your photo. Where you paint the mask black, the image below disappears. Where you paint it white, it shows through. And the real magic? Shades of gray create partial transparency, which is your secret weapon for soft, realistic edges.
If you mess up, you don't have to mash Ctrl+Z and hope for the best. Just switch your brush to white and paint the pixels right back in. It’s a completely forgiving workflow that gives you total freedom to refine your selection until it’s perfect.
The Pen Tool for Razor-Sharp Edges
When you’re working with hard, clean lines—think a new smartphone, a book, or a modern chair—the Pen Tool is your absolute best friend. It has a bit of a learning curve, sure, but nothing else gives you that same level of crisp, geometric precision.
You click to create anchor points and then click-and-drag to pull out handles that bend the line, letting you trace the contours of your object with mathematical accuracy. Once you’ve outlined the entire thing, you convert that vector path into a selection, and bam—you have a flawless layer mask. It's meticulous, but the payoff is an incredibly clean cutout. For anyone doing serious e-commerce work, learning the Pen Tool is non-negotiable. And once you have that perfect cutout, you can learn how to add a drop shadow in Photoshop to really make it pop.
Conquering the Ultimate Challenge: Hair and Fur
Alright, time to face the final boss of background removal: hair. Wispy flyaways, fluffy pet fur, messy ponytails… this is where most people give up. But this is also where a tool like Photoshop's Select and Mask workspace proves its worth.
This dedicated feature is a game-changer for tackling those impossible edges.
- First, grab a rough selection with something like the Quick Selection Tool. Don't stress about getting every last strand. Just get the basic shape.
- Now, head into the Select and Mask workspace. This is your command center for fine-tuning.
- Find the Refine Edge Brush. This thing is pure magic. You simply paint over the fuzzy edges—the hair, the fur—and Photoshop’s algorithm intelligently figures out what’s foreground and what’s background.
- Finally, use the sliders for Smooth, Feather, and Contrast to clean it up, then output the result to a new layer with a layer mask.
This technique transforms a job that used to take hours of painstaking clicking into a far more manageable process. It preserves those delicate, natural details that make a photo feel real. For a closer look at this in action, our guide on how to remove the background from a product photo dives deep into refining edges.
Programmatic Removal for Developers and Automation
Alright, let's switch gears and talk to the builders, the scripters, and everyone who lives in a command line. Manual tools and one-click web apps are great, but what happens when you need to process ten thousand images before your next coffee break? That's when you call in the big guns: programmatic background removal.
This is all about building background removal directly into your application or workflow. You create a seamless, automated pipeline that just works. Whether you're wrangling user-generated content, prepping a massive e-commerce catalog, or just automating a mind-numbingly tedious part of your job, this is how you operate at scale.
We'll dive into two fantastic approaches: tapping into a specialized API for raw power and simplicity, and wielding command-line tools for quick, scriptable edits right on your machine.
Using an API for Scalable Background Removal
Honestly, the most robust and scalable way to automate this is with a dedicated image processing API, like the one we've built at PixelPanda. Think of an API as a direct line to a supercomputer that's a world-class expert at one thing: editing photos flawlessly. You send it an image, and it sends you back a perfect cutout in seconds.
The beauty of this is that you don't have to build or maintain any of the ridiculously complex machine learning models yourself. You just make a simple request, and all the heavy lifting is handled for you.
Let's imagine a real-world scenario. You're building an e-commerce platform where sellers upload their own product photos—a chaotic mix of good, bad, and ugly. You can use a simple API call to automatically standardize every single image with a clean, transparent background.
Here's how easy it is using a quick cURL command. You can run this right from your terminal to see it in action:
curl -X POST
-H "Authorization: Bearer YOUR_API_KEY"
-F "image_url=https://example.com/your-image.jpg"
PixelPanda Background Removal API
With just that one command, the API gets to work. For those building something more substantial, dropping it into a Python script is just as simple:
import requests
api_key = 'YOUR_API_KEY'
image_path = 'path/to/your/image.jpg'
response = requests.post(
'PixelPanda Background Removal API',
headers={'Authorization': f'Bearer {api_key}'},
files={'image': open(image_path, 'rb')}
)
if response.status_code == 200:
with open('result.png', 'wb') as f:
f.write(response.content)
print("Background removed successfully!")
else:
print(f"Error: {response.status_code}")
This tiny script opens a local image, sends it off, and saves the clean PNG. You could easily wrap this in a loop to process an entire folder, turning a week's worth of work into a five-minute task. To see everything it can do, developers can check out the full PixelPanda API documentation for more examples and endpoints.
Quick and Dirty Edits with Command-Line Tools
Sometimes you don't need a full-blown API integration. You just need a fast, scriptable way to handle images locally. For that, the legendary ImageMagick is an absolute classic. It's a free, open-source beast of a software suite for image manipulation, and it’s incredibly powerful once you get the hang of it.
While it lacks the sophisticated AI of a dedicated service for tricky subjects like hair, it's a lifesaver for simpler jobs with high-contrast backgrounds.
Think of ImageMagick as the Swiss Army knife of image processing. It’s not always the most elegant tool for every single job, but it’s versatile, reliable, and can be bent to your will with a few lines of code.
For example, if you have an image with a solid white background, you could knock it out with a single command:
magick input.jpg -fuzz 10% -transparent white output.png
Let's break that down real quick:
magick input.jpg: This is your source image. Simple enough.-fuzz 10%: This is the secret sauce. It tells ImageMagick to treat colors that are close to white (within a 10% tolerance) as if they are pure white. This is crucial for catching off-white shades and JPEG compression artifacts.-transparent white: This command makes the selected color (and its "fuzzed" neighbors) transparent.output.png: And finally, this saves the result as a PNG, which is essential to preserve that new transparency.
This method is perfect for automating simple, repetitive tasks—like prepping logos or basic product shots—all without ever leaving the comfort of your terminal.
Which Background Removal Method Is Right for You
Struggling to decide which path to take? It really comes down to what you're trying to accomplish.
Here's a quick breakdown to help you pick the perfect tool for the job based on your needs.
| Method | Best For | Speed | Control | Scalability |
|---|---|---|---|---|
| Automated Tool/API | High-volume, e-commerce, user-generated content, complex images (hair, fur). | Blazing fast | Low (It just works) | Infinite |
| Desktop Software | One-off projects, complex artistic edits, when you need ultimate control. | Slow to moderate | Maximum | Low |
| Command-Line | Simple, high-contrast images, local batch processing, scripting simple tasks. | Fast | Moderate | Moderate |
Ultimately, there’s no single "best" method—just the best one for your specific project. For raw speed and scale, an API is king. For artistic perfection on a single image, nothing beats getting your hands dirty in Photoshop. And for quick, scripted jobs, the command line is your friend.
Pro Tips for Flawless Cutouts Every Time
Alright, you've got the basics down. But the difference between a good cutout and a great one lives in the details. Getting a subject isolated is step one, but making it look so natural that nobody even suspects it was edited? That’s the real win.
This is your field guide to nailing those finishing touches. We're talking about avoiding those tell-tale jagged edges and that awful "helmet hair" look. The goal is to create cutouts so clean they look like they were shot against a clean background from the get-go.
Master the Art of Soft Edges
Nothing screams "bad Photoshop job" louder than a razor-sharp, pixelated edge on a subject. The real world has soft transitions, and your edits should reflect that. This is where a little bit of feathering works its magic.
Feathering is just a fancy term for softening the very edge of your selection. It helps the subject melt into its new background instead of looking like a sticker slapped on top. Most decent editing software has a "feather" setting you can tweak. But go easy! Start with just 1 or 2 pixels and see how it feels.
The goal is to create an edge that’s just soft enough to look natural without becoming a blurry mess. It's a subtle trick that fools the eye into believing the subject belongs in its new environment.
This tiny adjustment is especially critical for things that aren't perfectly rigid, like clothing, skin, or the soft focus on a product shot. It adds a layer of realism that elevates the entire image.
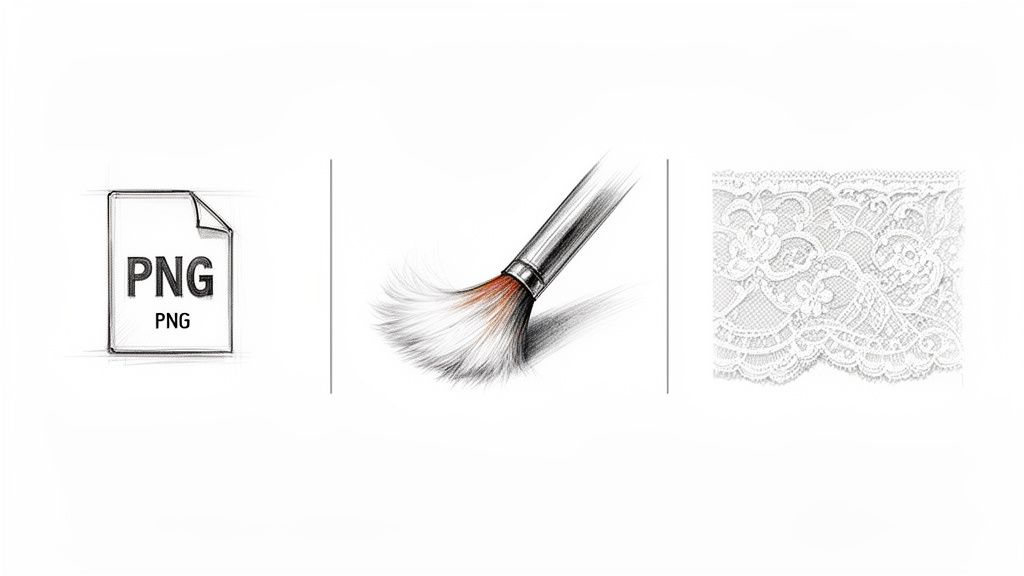
PNG Is Your Best Friend
When you're ready to save your masterpiece, you have choices, but only one is correct if you want to preserve transparency: PNG (Portable Network Graphics). Seriously, this is non-negotiable.
JPEGs will ruin your hard work by filling any transparent areas with a solid color, usually white. A PNG, on the other hand, supports an alpha channel—the secret sauce that stores all the transparency information, keeping your cutout crisp and background-free.
When you save, always choose PNG-24.
- PNG-24: This one’s the high-roller. It supports millions of colors and full alpha transparency for the best possible quality.
- PNG-8: This is the budget option. It’s limited to 256 colors and has clunky transparency, which often results in jagged, ugly edges. Just avoid it.
Tackling Tricky Subjects
Let's be real, not all subjects are easy. A coffee mug is one thing, but what about the stuff that gives editors nightmares?
For semi-transparent objects like glass, smoke, or a bride's veil, the trick is to play with opacity. Don't try to completely erase the background showing through them. Instead, use a layer mask and a soft, gray brush (not pure black) to gently reduce the background's visibility, maintaining that delicate, see-through quality.
Intricate patterns like lace or a chain-link fence are another beast entirely. This is where automated tools can really shine, as they're often better at detecting all the tiny gaps. If you're going the manual route, you'll need patience. Tools like Photoshop's "Select and Mask" workspace are your best friends here, allowing you to meticulously refine those complex edges.
There's a reason everyone is obsessed with this. The e-commerce world lives and dies by high-quality imagery, and the background removal market is on track to hit USD 1,000 million by 2035. Clean product shots drive 67% of purchasing decisions, and merchants using modern automated tools report sales lifts of 15-20%. You can dive deeper into the market trends for image background removal to see just how big this is.
Got Questions? We've Got Answers
Still have a few things bouncing around in your head? Good. That means you're thinking like a pro. When you start getting serious about background removal, a few common questions always surface. Let's tackle them head-on.
What's the Best File Format for a Transparent Background?
PNG. Full stop.
If you want transparency, PNG (Portable Network Graphics) is your only real choice. It's built from the ground up to support what's called an "alpha channel"—basically, an extra layer of information that tells each pixel how see-through it should be. This is the magic that makes transparency work.
JPEGs, on the other hand, are clueless about transparency. If you try to save your beautiful cutout as a JPEG, the software will panic and fill all those transparent areas with a solid color (usually white). All your hard work, gone.
Pro Tip: Always, always save your final file as a PNG-24. It gives you the best quality for both color and transparency, ensuring your cutout looks crisp and clean wherever you put it.
How Can I Remove the Background from a Ton of Images at Once?
Doing images one-by-one is fine for a quick project, but it's a one-way ticket to insanity if you've got a whole product catalog to get through. For bulk jobs, automation is your new best friend.
You've got two main routes to go:
- Fire up an API: For developers or anyone comfortable with a bit of code, an API from a service like PixelPanda is the gold standard. You can whip up a simple script that points to a folder, tells the API to process every image inside, and saves the clean versions automatically. It's powerful, scalable, and lets you build this process right into your own workflow.
- Use a Batch Processing Tool: Don't want to code? No problem. Many modern web tools and desktop programs have a batch feature. It's usually a simple drag-and-drop affair: you dump an entire folder of images into the uploader, click a button, and go grab a coffee while the machine does all the heavy lifting.
Can AI Really Handle Tough Stuff Like Hair and Fur?
Oh, absolutely. And it's gotten scary good.
Not too long ago, AI would butcher hair, leaving you with a clumpy, "helmet hair" mess. But the AI models powering tools like PixelPanda have been fed a diet of millions upon millions of images. They've seen it all.
This massive training library taught the algorithms to see the world more like we do. They can now pick out individual wisps of hair and fuzzy edges with a precision that used to take a Photoshop wizard hours of painstaking work with the Pen Tool.
Look, a master designer with a Wacom tablet can still get that final 1% of perfection. But today's AI gets you 99% of the way there in about 1% of the time. For almost every practical use case, AI is the smarter, faster bet.
What If I'm Stuck with a Low-Resolution Image?
Garbage in, garbage out. It’s the oldest rule in digital imaging. You can remove the background from a low-res photo, but the result will almost always look fuzzy, pixelated, or have jagged edges. The software just doesn't have enough pixel data to draw a clean line.
The real fix is a one-two punch: upscale first, then remove the background.
Find a tool that has an AI upscaler built-in. Run your low-res image through the upscaler to increase its size and sharpness before you even think about touching the background. This gives the background removal algorithm a much healthier, data-rich file to work with, leading to a dramatically cleaner final cutout. It's a simple extra step that makes a night-and-day difference.
Ready to stop fighting with backgrounds and start creating perfect cutouts in seconds? PixelPanda wraps an entire suite of AI tools—background removal, upscaling, inpainting—into a dead-simple interface and a robust API. Try PixelPanda for free and see what you've been missing.