Creating product images with AI can save time and money while improving online sales. Traditional methods are costly, but AI tools can generate high-quality, customizable images for as little as $0.12–$2.00 per image – an 80% cost reduction compared to studio shoots. This guide outlines how to prepare, generate, and optimize AI-driven product images to boost conversions by up to 23%.
Key Steps:
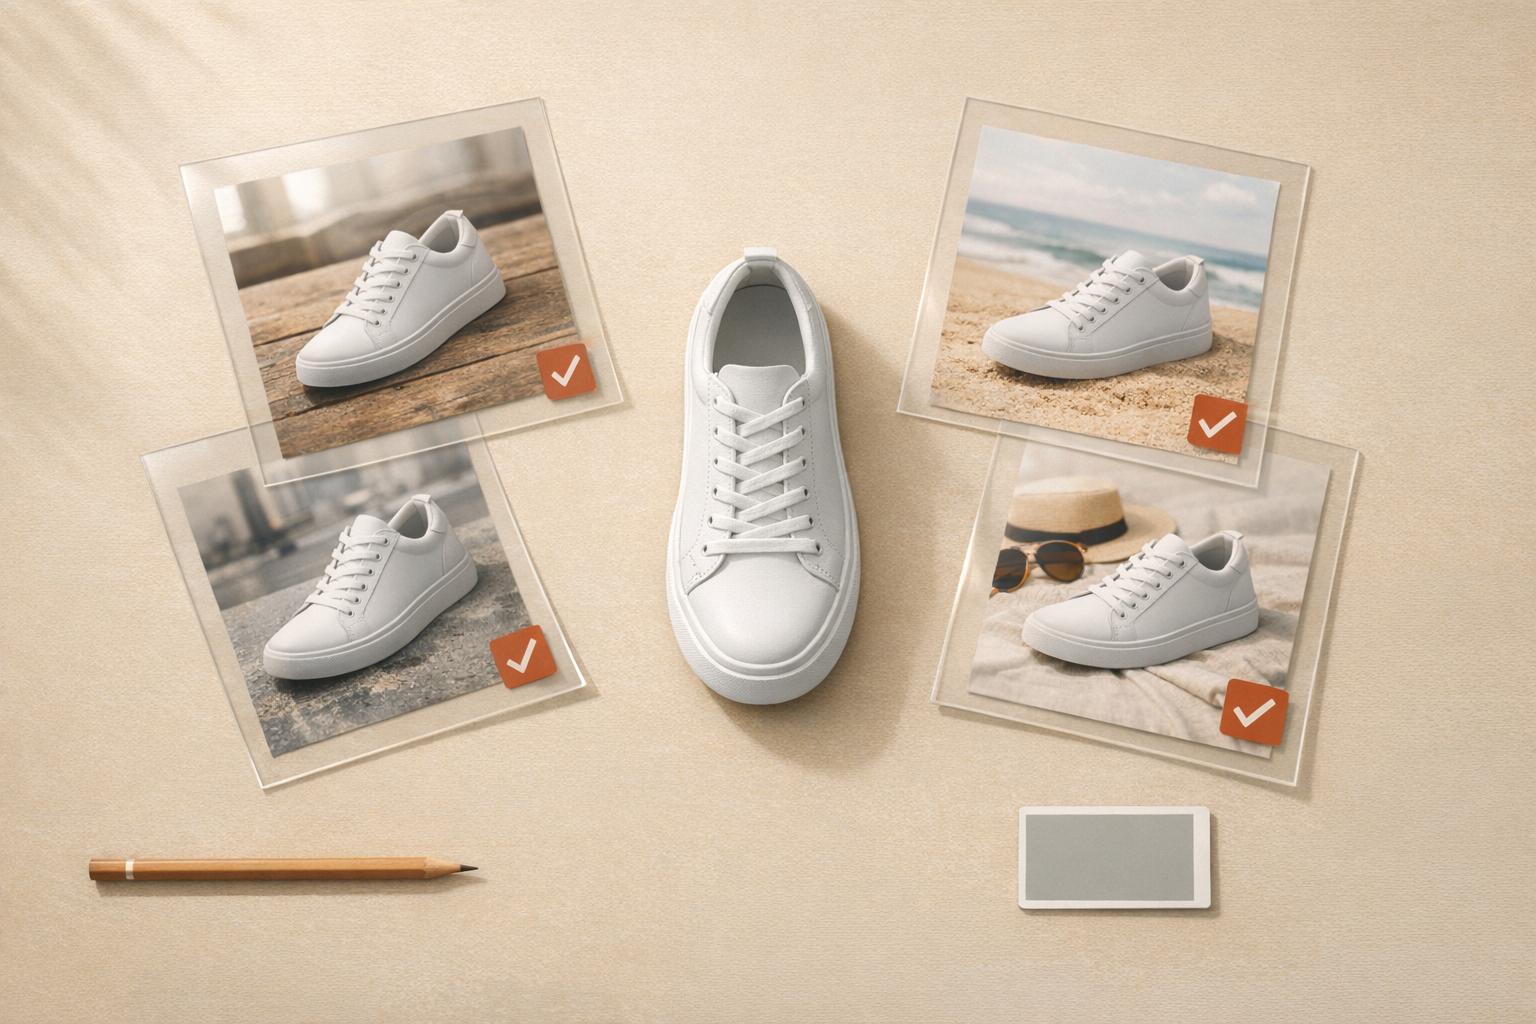
- Define Variations: Plan angles, backgrounds, and lighting styles (e.g., front view, lifestyle settings).
- Gather References: Use clear, high-quality photos for accurate results.
- Choose AI Tools: Select platforms like PixelPanda for batch uploads, compliance, and commercial rights.
- Set Specifications: Ensure proper resolution, aspect ratios, and file formats (e.g., WebP).
- Craft Prompts: Use precise terms for materials, angles, and lighting to guide the AI.
- Quality Control: Review outputs for consistency, artifacts, and marketplace standards.
- Optimize for Web: Compress files, add alt text, and assign images to SKUs for SEO and usability.
By following these steps, you can streamline image creation and ensure professional, consistent visuals that drive sales.
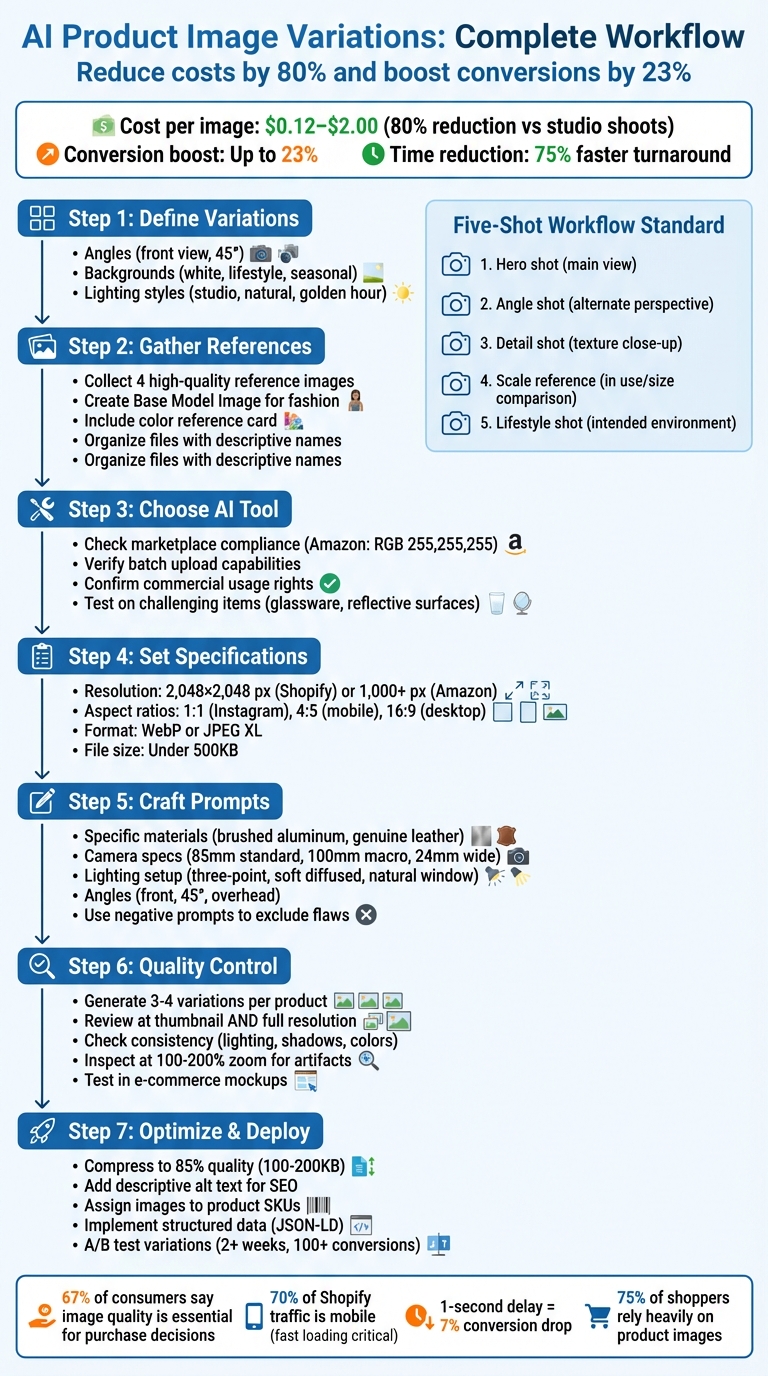
7-Step AI Product Image Generation Workflow for E-Commerce
Preparation: Getting Ready for AI Image Generation
Define Your Product Variation Needs
Start by outlining the specific variations you need for your product images. This includes angles, backgrounds, and lighting styles. For instance, you might need shots from the front or at a 45° angle, with clean white, seasonal, or other themed backgrounds. Lighting styles could range from studio high-key to natural light or even a golden-hour effect.
If you’re working with fashion items, think about the model attributes that will best showcase your product. Consider factors like age range, body type, and activities (e.g., lounging, exercising, or commuting). For kitchenware, opt for authentic kitchen settings, while fitness gear might look better in gym or outdoor environments. One fashion brand reported a 25% increase in time spent on product pages and a 40% boost in conversions by tailoring their imagery to fit the right context.
To standardize your catalog, try a five-shot workflow:
- Hero shot: A main product view.
- Angle shot: An alternate perspective.
- Detail shot: A close-up showing texture or unique features.
- Scale reference: The product in use or shown alongside items for size comparison.
- Lifestyle shot: The product in its intended environment.
This structured approach ensures customers get a complete view of your product before making a decision. Once you’ve nailed down your variations, gather clear reference images to guide the AI.
Gather Reference Materials
Collect up to four high-quality reference images for each product. These should highlight different angles and feature clear, consistent lighting to help the AI capture specific details like textures, stitching, or materials. For example, if you’re showcasing leather goods, the AI needs sharp, well-lit images to replicate the leather grain accurately.
For fashion items, create a "Base Model Image." This is a straightforward, neutral portrait that serves as a foundation for creating on-model variations across different poses or outfits. Building a diverse library of models can also help connect better with your audience.
Keep your files organized with descriptive filenames and logical folders (e.g., Product Type > Color Variants > Angles). Include a color reference card in your initial frame to help maintain color accuracy. Additionally, craft a style guide that outlines lighting, framing, and color targets. This ensures a consistent look across all images and minimizes visual inconsistencies.
Choose Your AI Tool
The right AI tool depends on your specific needs. For marketplace sellers, compliance is key. For example, Amazon requires images with pure-white backgrounds (RGB 255,255,255) and 85% frame coverage. If you’re managing a large inventory, look for tools with batch upload capabilities and API access to streamline production.
One option is PixelPanda, which offers features like background removal, image upscaling, and customizable models. Pricing starts at $39/month (annual billing) for 7,000 credits, and it includes commercial usage rights – a must for any revenue-generating imagery.
Before committing, test the tool on challenging items like glassware or other reflective surfaces to check for visual artifacts. Beginners might benefit from AR-guided mobile shooting, which helps avoid common issues like crooked angles or poor lighting before the AI processes your images. Lastly, verify that you retain full commercial ownership of generated images and check whether your uploads are used to train the provider’s models.
Once you’ve chosen your tool, define the output specifications to ensure compatibility with your sales channels.
Set Output Specifications
Image resolution is critical. Shopify recommends 2,048×2,048 pixels for zoom functionality, while Amazon requires images with at least 1,000 pixels on the longest side. Aspect ratios also matter – square (1:1) works well for Instagram, portrait (4:5) is ideal for mobile feeds, and landscape (16:9) suits desktop banners.
Optimize your images for fast loading by using modern formats like WebP or JPEG XL, keeping file sizes under 500KB. Don’t forget to embed SEO metadata, including descriptive alt text and filenames. Even a one-second delay in loading can reduce conversions by 7%. With 70% of Shopify traffic coming from mobile devices, fast-loading images are essential.
If you’re selling in the EU, remember that the EU AI Act requires synthetic images to include machine-readable tags or visible watermarks. Make sure your chosen AI tool supports these compliance features.
| Product Type | Suggested Scenes | Recommended Lighting |
|---|---|---|
| Kitchenware | Kitchen, Home | Natural Window Light (Soft/Inviting) |
| Fitness Gear | Gym, Nature, Outdoor | Studio High-Key (Clean/Professional) |
| Fashion | Studio, Street, Café | Golden Hour (Warm/Lifestyle) |
| Electronics | Studio, Office, Home | Moody/Low Light (Dramatic/Premium) |
| Beauty | Bathroom, Studio | Studio High-Key or Natural Light |
Prompt Engineering: Creating Clear AI Instructions
Include Specific Product Details
When crafting prompts, stick to generic product categories – AI models understand terms like "chair" or "container" more effectively than specific brand names. To ensure the product’s appearance matches your vision, include precise material descriptions. For example, say "brushed aluminum", "matte plastic", "glossy ceramic", or "genuine leather texture" to avoid generic or low-quality results, like cheap-looking plastic.
Camera specifications can elevate the presentation of your product. For instance, an 85mm lens is ideal for standard product photographyxelpanda.ai/ai-product-photos”>product photography, a 100mm macro lens captures intricate details like stitching or fabric textures, and a 24mm lens works well for wide-angle lifestyle shots. Be clear about your lighting setup too: describe "three-point studio lighting" for professional catalog images, "soft diffused lighting" for a welcoming effect, or "natural window light" for a more authentic vibe.
Angle specifications also matter. Clearly state whether you need a front view, a 45-degree angle, a three-quarter view, or an overhead flat lay. To provide a sense of scale, add context like "shown in hand for scale" or "fits in the palm." Keep your prompts concise – 10 to 15 words work best – and avoid conversational language.
Finally, clarify which attributes you want to change across variations.
Define Variation Attributes
Be precise about what should vary in your images. For example, instead of saying "different backgrounds", specify "pure white background" or "color code #ffffff" to avoid inconsistencies like off-white or cream tones that don’t meet marketplace standards. If you’re showcasing kitchenware, you might specify "modern kitchen with a marble countertop", or for electronics, "minimalist office with a modern desk."
When working with unique products, use Precise Mode to maintain control. For items that need to occupy a specific portion of the frame, aim for around 70% frame coverage. This leaves enough space for sale badges or text overlays without compromising the product’s visibility.
Once the variations are defined, refine the visual tone using style guidelines.
Add Style Guidelines
Set the mood of your images with clear lighting instructions. For professional and polished results, use terms like "Studio High-Key" or "Three-point lighting." If you want a softer, more welcoming look, specify "Natural Window Light" or "Diffused lighting." For premium or dramatic products, try "Rim lighting" or "Moody, Low Light."
"67% of consumers say the quality of a product image is essential in selecting and purchasing a product, indicating that image quality is not merely decorative; it is a primary indicator of trust." – UC Brand Labs
Start with a simple base, such as "product on white", and then introduce modifiers one at a time, like "textured wood surface." This method allows you to experiment with different elements while maintaining consistency across your catalog. It also ensures you have control over specific visual adjustments.
Use Negative Prompts
Negative prompts are essential for eliminating common AI-generated flaws and maintaining high-quality standards. For example, exclude terms like "blurry", "low resolution", "pixelated", "watermark", "text overlay", and "compression artifacts" to ensure crisp, professional images. To meet e-commerce requirements for pure white backgrounds, exclude phrases like "gray background", "off-white", "dirty white", and "shadows on backdrop."
To avoid unprofessional results, filter out terms such as "plastic-looking metal", "fake materials", "unrealistic surface", and "incorrect texture." For better composition, exclude "cluttered background", "off-center", "poor framing", and "distracting elements." When it comes to lighting, remove "harsh shadows", "overexposed", "underexposed", and "color cast" to maintain balanced and appealing visuals.
Use PixelPanda Templates
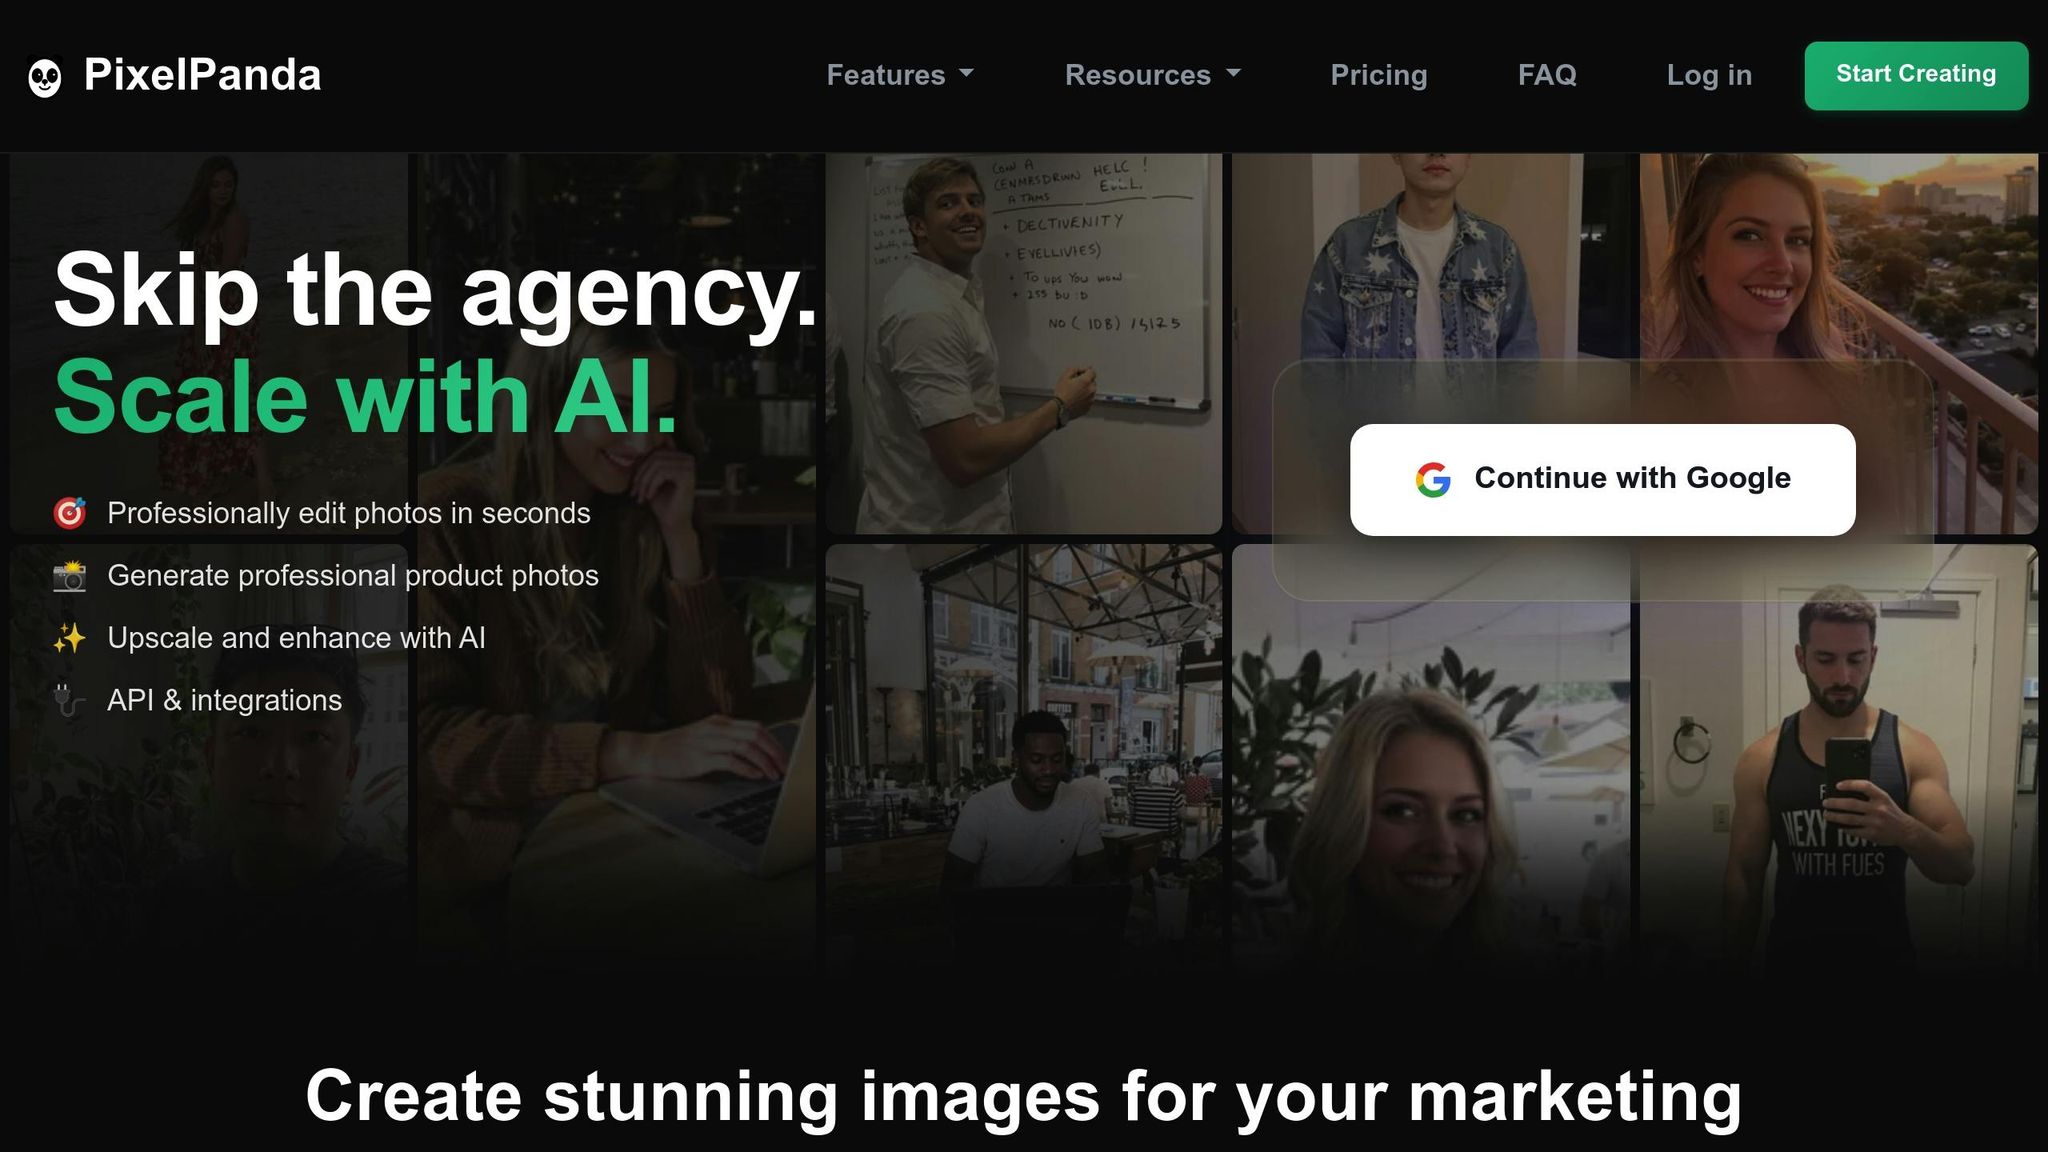
PixelPanda provides pre-designed templates tailored for common e-commerce needs, saving you time and effort. For instance, the product holding feature naturally places items in a model’s hand, while the outfit-swapping tool showcases clothing on consistent models across various styles. These templates come with commercial usage rights, ensuring you can use them freely for your catalog.
PixelPanda’s templates also utilize Face Reference technology, maintaining the same model identity across multiple variations. This is particularly helpful for creating cohesive catalogs, whether you’re displaying a series of lifestyle images or featuring multiple products with consistent styling. These tools are designed to help you produce polished, uniform visuals that enhance your product’s appeal and boost sales.
Generation and Quality Control: Reviewing AI Outputs
Generate and Review Multiple Options
When creating product images, aim to produce three to four variations for each item. This strikes a good balance – offering enough choices to evaluate quality without making the review process overwhelming.
Make sure to review each image in two ways: as a thumbnail and at full resolution. While a thumbnail might look sharp and polished, zooming in often reveals flaws like blurry textures or distorted details. This is especially important since online shoppers typically expect to see three to four images per product.
Once you’ve selected your options, shift your focus to maintaining visual consistency across all images.
Check Visual Consistency
Consistency is key to creating a professional look. Start by checking that lighting direction and shadow placement are uniform across all images. For example, if the light source in one image comes from the left, ensure it’s the same in the others. A quick way to check brightness levels without the distraction of color is by applying a temporary black-and-white adjustment.
Also, ensure your images meet marketplace standards as outlined in your specifications. If you’re using AI models, tools like Face Reference technology can help maintain consistent facial features, body proportions, and skin tones across various poses.
"Visual consistency is not just an aesthetic choice but a performance driver. When every SKU in a catalog shares the same lighting, background style, and framing, it creates clearer brand identity." – Photoroom
A great example of this is GoodBuy Gear, which standardized over 42,000 product images using AI tools in 2025. Their effort to ensure consistent, clear, and accurate images led to a 23% boost in conversion rates.
Inspect for Artifacts
Zoom in at 100–200% to catch subtle issues that might go unnoticed in thumbnails. Pay close attention to halos or color fringes around product edges, especially on white backgrounds. Also, check that logos, barcodes, and text labels are clear and undistorted – AI can sometimes misinterpret or alter these elements.
"If an edge still bugs you at 200% zoom, fix it now – it will be visible after export on bright UI backgrounds." – andywang, Skywork AI
For lifestyle images, watch out for oddities like extra fingers, merged objects, or uneven facial features. These errors can make the image feel unnatural and harm your brand’s credibility. Additionally, verify that textures appear realistic – not overly smoothed or artificial – and that shadows look natural, with the darkest point at the contact area gradually softening outward.
Here’s a quick troubleshooting guide for common issues:
| Symptom | Cause | Solution |
|---|---|---|
| Warped labels/text | Model "creativity" | Add "preserve label text exactly" to the prompt; overlay original text in post |
| Plastic/smooth texture | Over-aggressive denoising | Include "retain natural texture and grain" in the prompt; boost microcontrast in post |
| Bright/white fringes | Poor edge detection | Use a "Defringe" tool (1–2 px) or "Blend If" sliders for correction |
| Shadow feels "off" | Single-layer shadow | Rebuild shadows into two layers: sharp contact shadow + soft cast shadow |
After addressing these issues, test your images in a realistic e-commerce setting.
Test in E-Commerce Mockups
Preview your images in actual product grids and detail pages to see how they perform in context. This step helps you identify any inconsistencies in scale, lighting, or styling that might not be obvious when viewing images individually.
Double-check that your images meet technical requirements, such as dimensions of 1,000 px to 1,600 px on the longest side for proper zoom functionality, pure-white backgrounds for marketplace compliance, and embedded sRGB color profiles. Ensure that any text overlays, sale badges, or promotional elements don’t obscure key product details.
sbb-itb-76ad1b7
AI PRODUCT IMAGE PROMPTS (PROFESSIONAL RESULTS)
Optimization and Integration: Preparing Images for Your Store
Once you’ve ensured your images are top-notch, the next step is getting them ready for smooth integration into your online store.
Optimize Image Files for Web Use
Choosing the right file format and size is crucial. Go with WebP files – they’re 25%–35% smaller compared to JPEGs but maintain high quality. Stick to dimensions of 2,048 x 2,048 pixels to enable zoom features on platforms like Shopify and Amazon. Keep file sizes between 100–200 KB to ensure fast loading times. Why? Every second of delay can cut your conversions by about 7%.
To optimize further:
- Compress images to 85% quality.
- Strip away unnecessary EXIF data.
- Save files in sRGB format for consistent color rendering.
Don’t forget Alt text! Use descriptive text that includes the product name and key attributes – it’s great for accessibility and SEO. For images that appear above the fold, speed up loading by adding the fetchpriority="high" attribute in your HTML.
Assign Images to Product SKUs
Organizing images by SKU ensures customers see the correct visuals for each product variation. For Shopify, you can assign images by clicking the image icon next to each variant in the product editor. If you’re managing multiple variants, use the bulk "Add images" action to save time. WooCommerce users can upload images to the Product Gallery and link them to variations like size or color through product attributes.
Before uploading, rename files with descriptive names. For example, swap "AI_variation_1.jpg" for something like "SKU123-blue-front.webp". Including the SKU in the filename simplifies mapping, whether you’re working manually or using automation tools. This approach can cut down the time spent organizing hundreds of products – from nearly 100 hours to just a few hours with the help of automation.
Use Structured Data for Variations
Structured data makes it easier for search engines to connect images with the correct product variations. Use JSON-LD schema markup to include all variation images in the "image" array. Link each image to its SKU and use the "itemGroupId" attribute to group related variants.
"When product variants are properly marked up with structured data, search engines can display rich snippets that include price ranges, availability, color options, and reviews." – Ahad Qureshi, SEO and Tech Content Writer, Yoast
Add global identifiers like GTIN or MPN to each variant’s structured data to help search engines index your products accurately. If you’re using AI-generated images, include the digital_source_type attribute set to "trained_algorithmic_media". Test your markup with Google’s Rich Results Test tool to catch errors before they impact your visibility.
A/B Test Image Variations
Testing different image styles can reveal what resonates most with your audience. Run split tests comparing variations like backgrounds, angles, or lifestyle shots. Track metrics such as click-through rates, time spent on the page, and conversions to determine which images work best. Tools like PixelPanda can generate multiple variations – ranging from clean product shots to user-generated content-style video ads – without the need for lengthy photoshoots.
Give each test at least two weeks or wait until you’ve gathered 100+ conversions per variation for accurate results. Considering that 75% of online shoppers rely heavily on product images when deciding what to buy, even small tweaks can have a noticeable impact on your sales.
Conclusion
By following this checklist, you can ensure your product images are consistent, compliant, and ready to drive conversions. What once took weeks can now be achieved in minutes by defining your needs, writing clear prompts, performing quality checks, and optimizing images for web use. AI-driven workflows can reduce turnaround time by 75% and cut visual content costs by up to 80% compared to traditional studio shoots.
"AI product photography is not just offering brands a new way to create images; it’s actually changing how they work, launch, and scale." – Mike Lehman, Senior Content Strategist, Pikes
The key benefit here is scalability. PixelPanda’s AI tools align with every step of the checklist – from prompt creation to quality assurance – ensuring reliable and scalable image production. You can generate hundreds of high-quality variations with different backgrounds, lighting setups, and formats, all without adding to your workload. Whether you’re creating lifestyle shots for Instagram or meeting Amazon’s pure-white background requirements, these tools allow you to test and find the variations that truly boost conversions.
FAQs
How do AI-generated product images help increase online sales?
AI-generated product images can play a big role in boosting online sales by improving how your products look and ensuring consistency across all your listings. When your images look professional and polished, they help build trust with potential customers – making them more likely to hit that "Buy Now" button.
On top of that, AI tools make it easier and faster to create a variety of image options. This means sellers can quickly respond to new trends or even tailor images to specific audiences. The result? More engagement, better shopping experiences, and, in the end, higher sales.
How can I ensure consistent and high-quality AI-generated product images?
To create consistent, high-quality AI-generated product images, start with clear, high-resolution reference photos. Make sure the images are well-lit and capture the product from multiple angles. This helps the AI interpret the details accurately and deliver precise results.
When using AI tools, include detailed descriptions of the style, branding, and any specific elements you need. This helps ensure the generated images match your brand’s look and feel, maintaining a cohesive visual identity.
You can also use tools like PixelPanda to improve image quality. Features such as background removal, image upscaling, and customizable AI models make it easier to standardize your product visuals. By applying these steps, you can achieve polished, professional images that enhance your e-commerce listings.
What should I consider when choosing an AI tool for generating product images?
When choosing an AI tool for product image creation, start by pinpointing what you need. Are you looking for background removal, lifestyle staging, or options for more tailored creativity? Look for tools that deliver realistic visuals, quick processing, and transparent licensing terms.
It’s also worth checking whether the tool includes features like bulk editing, background generation, or virtual staging to make your workflow smoother. Don’t forget to ensure the tool aligns with your budget and has solid reviews for reliability and performance with the type of products you sell. The right AI tool can save you time and elevate the quality of your e-commerce imagery.