

Product photography for ecommerce isn’t just about making your products look pretty—it’s about creating visual experiences that answer customer questions, build trust, and eliminate purchase hesitation. The difference between a 2% conversion rate and a 5% conversion rate often comes down to how well your product images communicate value, quality, and authenticity.
Table of Contents
- Why Product Photography Directly Impacts Your Bottom Line
- Essential Equipment for Professional E-Commerce Product Photography
- Lighting Setup That Eliminates Shadows and Creates Consistency
- The Step-by-Step Shooting Process for Maximum Efficiency
- 7 Types of Product Images Every E-Commerce Store Needs
- Post-Production Workflow: From RAW Files to Conversion-Ready Images
- Image Optimization for Speed Without Sacrificing Quality
- A/B Testing Your Product Photos to Maximize ROI
- Frequently Asked Questions
Why Product Photography Directly Impacts Your Bottom Line

When customers can’t physically touch, feel, or examine your products, your product photography becomes the primary decision-making tool. A study by Justuno found that 93% of consumers consider visual appearance to be the key deciding factor in a purchasing decision—more influential than product descriptions, reviews, or even price.
But here’s what most e-commerce sellers miss: product photography for ecommerce isn’t just about aesthetics. It’s about answering specific questions your customers have before they even ask them. Does this fabric wrinkle easily? How does the size compare to everyday objects? What does the product look like in natural lighting versus studio conditions?
The financial impact is measurable. According to BigCommerce, high-quality product images can increase conversion rates by up to 30%. For a store doing $50,000 in monthly revenue, that’s an additional $15,000 per month—or $180,000 annually—just from improving your visual content.
Professional product photography also reduces return rates. When customers receive exactly what they saw in photos, they’re 35% less likely to initiate a return, according to Shopify’s merchant data. This doesn’t just save you shipping costs—it preserves customer relationships and lifetime value.
Key Takeaway
Your product photos aren’t marketing assets—they’re conversion infrastructure that either eliminates objections or creates them.
Essential Equipment for Professional E-Commerce Product Photography
You don’t need a $10,000 camera setup to create conversion-worthy product photography for ecommerce. What you need is the right equipment for consistency, speed, and repeatability. Here’s the realistic equipment breakdown for different budget levels:
Budget Setup (Under $500)
For sellers just starting out or testing new product lines, this setup delivers professional results without breaking the bank:
- Camera: Your smartphone (iPhone 12 or newer, Samsung Galaxy S21+, or Google Pixel 6+) — modern phone cameras have 12+ megapixel sensors that exceed Amazon and Shopify’s image requirements
- Tripod: Joby GorillaPod or Amazon Basics 60-inch tripod ($25-40) — eliminates camera shake and maintains consistent framing across product shots
- Lighting: Two 5600K LED panel lights with adjustable brightness ($80-120 for the pair) — provides consistent, color-accurate lighting
- Background: White poster board or seamless paper backdrop ($15-30) — creates the clean white background most marketplaces require
- Reflectors: 5-in-1 collapsible reflector kit ($20-35) — bounces light to eliminate harsh shadows
Total investment: $300-450. This setup is sufficient for products under 12 inches in any dimension and can produce images that convert just as well as photos from expensive DSLR setups.
Professional Setup ($500-$2,000)
Once you’re processing 50+ SKUs monthly or selling products over $100, upgrading your equipment pays for itself through time savings and image consistency:
- Camera: Canon EOS Rebel T7i or Sony A6400 with kit lens ($600-900) — provides RAW file capability for maximum editing flexibility
- Macro lens: 50mm f/1.8 or 100mm macro lens ($200-400) — essential for detail shots of jewelry, cosmetics, or textured products
- Lighting: Three-point lighting kit with softboxes ($200-350) — creates professional, shadow-free illumination
- Light tent: 24-inch or 32-inch collapsible photo studio box ($60-120) — speeds up shooting small products by 3-5x
- Backdrop system: Adjustable backdrop stand with multiple backdrop colors ($80-150)
- Tethering cable: USB-C to camera cable for live preview on computer ($25-40)
This mid-tier setup is what most successful e-commerce brands with $100K-$500K in annual revenue use. The ROI typically breaks even within 3-6 months through reduced outsourcing costs and faster time-to-market for new products.
Key Takeaway
Your equipment should scale with your SKU count and average order value, not your ego—a $400 smartphone setup can outperform a $4,000 DSLR setup if the photographer understands lighting and composition.
Lighting Setup That Eliminates Shadows and Creates Consistency

Poor lighting is the #1 reason product photos fail to convert. Harsh shadows, color casts, and inconsistent brightness across your product catalog create subconscious distrust. Customers won’t articulate “the lighting looks amateurish,” but they’ll bounce to a competitor whose photos feel more professional.
The goal of product photography for ecommerce lighting is to eliminate variables. Every product should look like it was photographed in the same environment, under the same conditions, with the same color temperature. Here’s how to achieve that:
The Three-Point Lighting Foundation
Professional product photographers use a three-light setup that wraps light around the product from multiple angles:
Position at 45 degrees to the product, slightly elevated. This is your main light that defines the product’s form and creates dimension. Use a softbox or diffuser to prevent harsh shadows.
Position opposite the key light at 60-70% the intensity. This softens shadows without eliminating them completely. Shadows add depth—you want to reduce them, not remove them.
Position behind and above the product, pointing toward the background. This creates separation between the product and backdrop, preventing a flat, two-dimensional look.
For budget setups with only two lights, skip the back light and use a white reflector opposite your key light as a fill. The reflector bounces light back onto the product at zero additional cost.
Color Temperature Consistency
All your lights must match color temperature, measured in Kelvin (K). For product photography for ecommerce, use 5500K-5600K bulbs—this is “daylight balanced” and produces accurate colors without post-production correction.
Never mix light sources. If you’re using LED panels, don’t supplement with window light or overhead room lights. Mixed color temperatures create color casts that are difficult to fix in editing and make products look different across your catalog.
| Light Source | Color Temperature | Best Use Case |
|---|---|---|
| Tungsten bulbs | 2700K-3200K (warm/yellow) | Avoid for e-commerce |
| Fluorescent bulbs | 4000K-5000K (cool/green) | Avoid for e-commerce |
| Daylight LED panels | 5500K-5600K (neutral) | Ideal for product photography |
| Natural window light | 5000K-6500K (varies by time/weather) | Lifestyle shots only (inconsistent) |
Pro tip: Photograph a white balance card or gray card in your first shot of each session. This gives you a reference point in post-production to ensure color accuracy across all images. For detailed guidance on setting up affordable lighting, check out our lighting setup guide for e-commerce sellers under $500.
The Step-by-Step Shooting Process for Maximum Efficiency
The difference between photographing 10 products in a day versus 50 products in a day isn’t talent—it’s process. Professional product photographers use systematic workflows that eliminate decision-making during the shoot. Here’s the exact process used by studios handling 200+ SKUs monthly:
Pre-Shoot Preparation (15-30 minutes)
Before you touch your camera, prepare your products and workspace:
- Clean every product: Use microfiber cloths to remove fingerprints, dust, and smudges. Lint rollers work for fabric products. This eliminates 80% of post-production retouching work.
- Steam or iron fabrics: Wrinkles are conversion killers for apparel. A $30 handheld steamer is essential equipment.
- Organize by size/type: Batch similar products together to minimize lighting and camera adjustments between shots.
- Set white balance: Use your camera’s custom white balance feature with a gray card to ensure accurate colors.
- Lock exposure settings: Shoot in manual mode (M) with fixed ISO, aperture, and shutter speed. This ensures consistent brightness across all images.
Camera Settings for Consistency
These settings work for 90% of product photography scenarios:
- ISO: 100-200 (lowest native ISO for minimal noise)
- Aperture: f/8-f/11 (provides front-to-back sharpness for most products)
- Shutter speed: 1/125 or slower (you’re on a tripod, so shutter speed doesn’t matter unless photographing moving subjects)
- File format: RAW (not JPEG) — gives you maximum editing flexibility for color correction and exposure adjustment
- Focus mode: Single-point autofocus or manual focus on the most important product feature
For jewelry, cosmetics, or products with fine details, increase aperture to f/16 or use focus stacking (taking multiple shots at different focus points and combining them in post-production).
Key Takeaway
Manual camera settings eliminate exposure variations between shots, cutting post-production editing time by 60-70% and ensuring visual consistency across your entire product catalog.
The Shooting Sequence
For each product, capture this exact sequence of images (covered in detail in the next section):
- Hero shot (primary product image on white background)
- Alternate angle #1 (typically 45-degree side view)
- Alternate angle #2 (back or top view)
- Detail shots (2-3 close-ups of key features, textures, or materials)
- Scale reference shot (product next to common object or in-use)
- Packaging shot (if applicable for unboxing appeal)
This sequence takes 8-12 minutes per product once you’ve established your workflow. Batch similar products together—photograph all hero shots first, then all alternate angles, then all detail shots. This minimizes camera and lighting adjustments.
7 Types of Product Images Every E-Commerce Store Needs
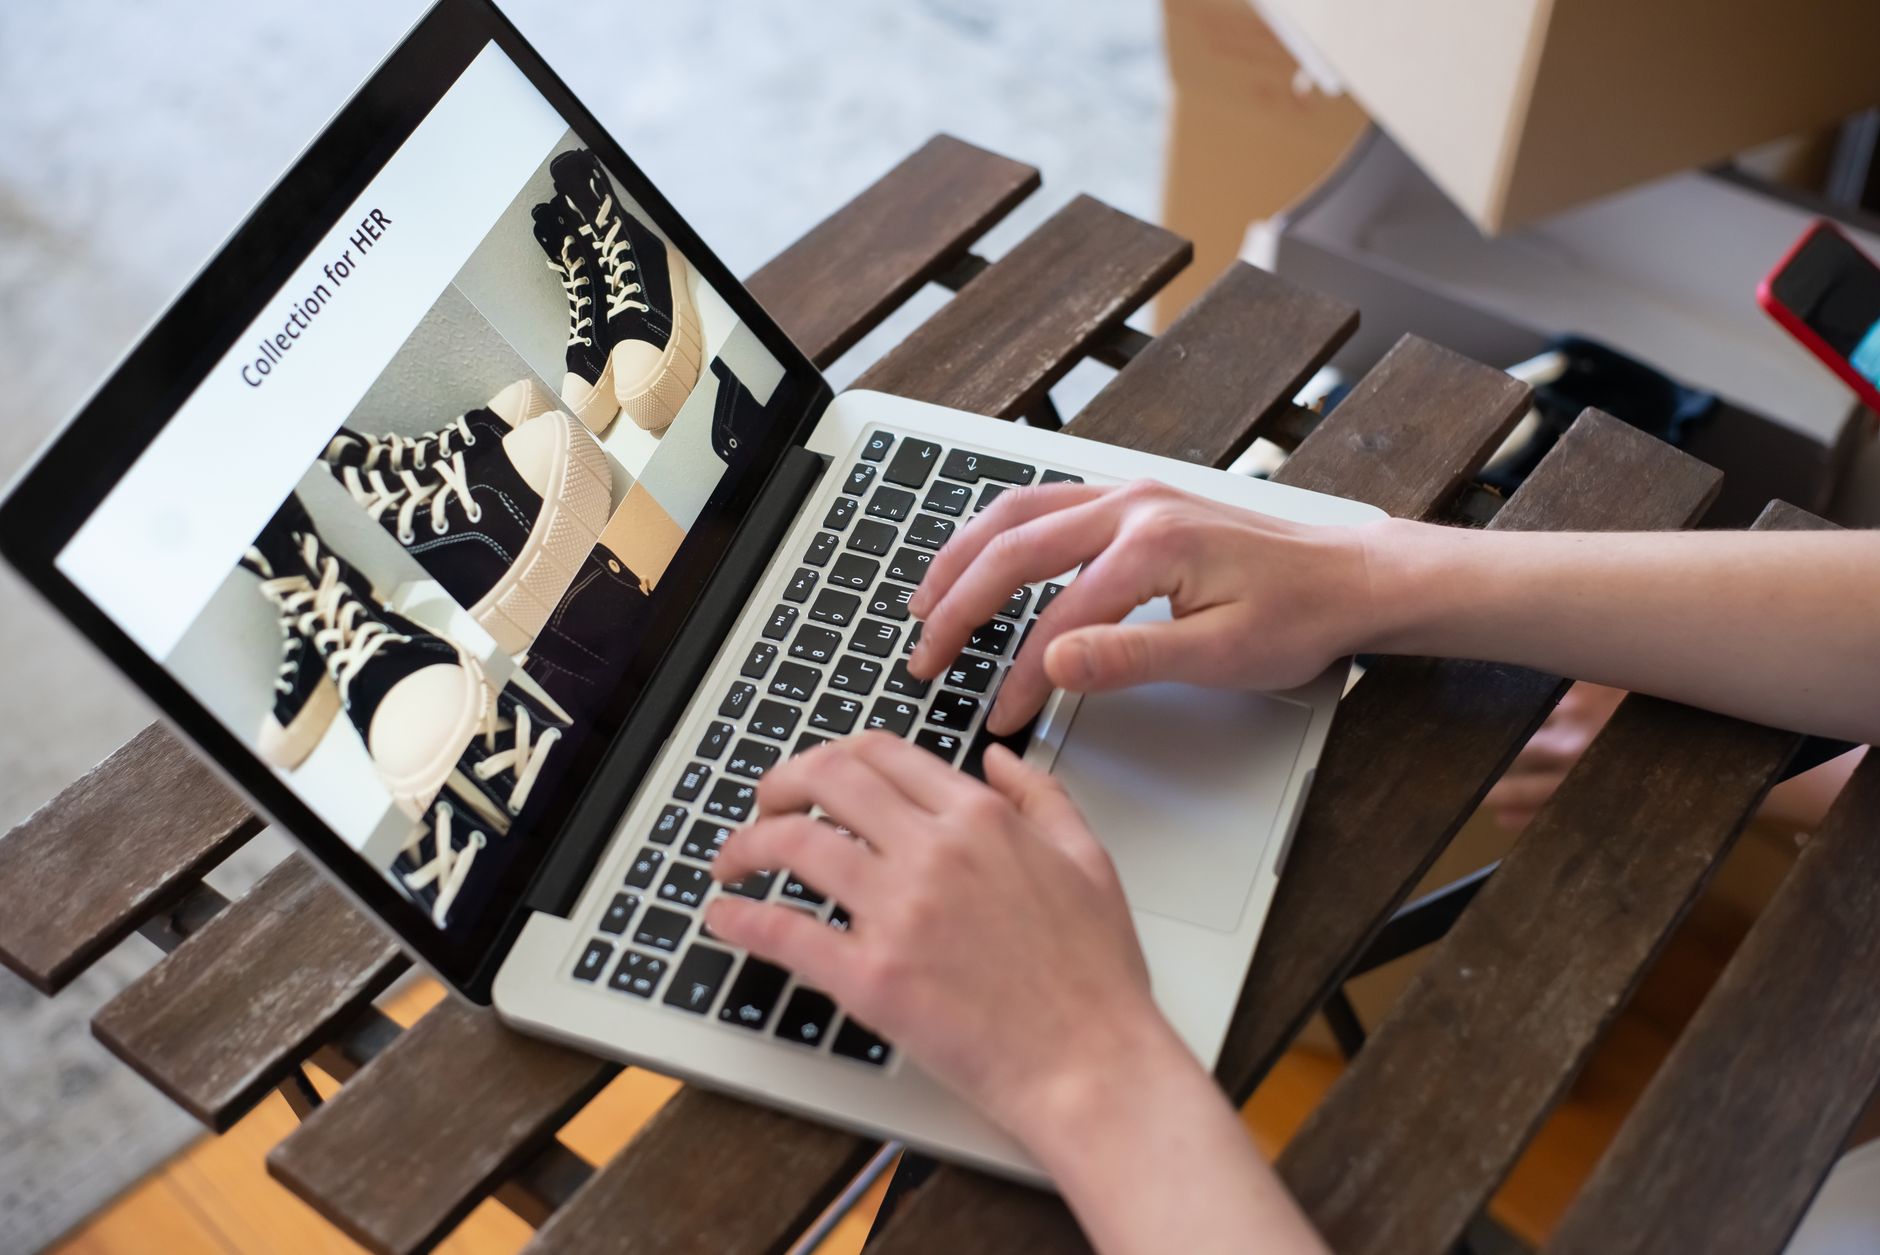
Amazon requires at least 5 product images. Shopify recommends 7-9. But quantity without strategy doesn’t move the needle. Each image type serves a specific purpose in the customer’s decision-making process. Here’s what converts:
1. Hero Shot (Primary Image)
This is the thumbnail image customers see in search results and category pages. It must be instantly recognizable and communicate what the product is within 0.3 seconds of viewing. Requirements:
- Pure white background (RGB 255, 255, 255)
- Product fills 80-85% of the frame
- Shot straight-on or at a slight 3/4 angle
- Entire product visible and in focus
- No props, text overlays, or lifestyle elements
This is non-negotiable for Amazon, Walmart, and most marketplaces. For your own Shopify store, you have more flexibility, but the white background hero shot still converts 23% better than lifestyle primary images, according to Shopify’s A/B testing data.
If you need to remove backgrounds from existing product photos quickly, our AI Background Remover can process images in seconds without Photoshop.
2. Alternate Angles (2-3 Images)
These answer the question “What does this look like from other perspectives?” Critical angles:
- Side view: Shows product depth and profile (essential for anything 3-dimensional)
- Back view: Reveals features not visible from front (zippers, pockets, connectors, labels)
- Top-down view: Shows layout, organization, or internal structure (bags, organizers, tech accessories)
Maintain the same white background and lighting as your hero shot. Customers should feel like they’re rotating the product in their hands, not viewing different products.
3. Detail Shots (2-4 Images)
These are extreme close-ups that showcase quality, materials, and craftsmanship. They answer objections like “Is this real leather?” or “How fine is the stitching?” Effective detail shots include:
- Material texture (fabric weave, leather grain, metal finish)
- Construction quality (stitching, seams, joints, welds)
- Functional elements (buttons, zippers, clasps, hinges)
- Unique features (logos, patterns, engravings, certifications)
Use a macro lens or your camera’s macro mode. The goal is to show details invisible to the naked eye at normal viewing distance. These images build trust by proving you’re not hiding imperfections.
4. Scale Reference Shot
Size perception is the #1 cause of product returns. A scale reference image eliminates ambiguity by showing your product next to universally recognized objects:
- Next to a credit card (for small items like jewelry, tech accessories)
- Next to a smartphone (for medium items like bags, cosmetics)
- In a human hand (for handheld items)
- Next to a ruler or measuring tape (for precision products)
This single image can reduce return rates by 18-25% for products where size confusion is common (bags, furniture, decor, apparel).
5. In-Use or Lifestyle Shot
This shows the product in its intended environment or being used by a person. It answers “How does this fit into my life?” and creates emotional connection. For e-commerce sellers, you have two options:
Option A: Hire a photographer for a lifestyle shoot ($500-2,000 for a half-day session with a model)
Option B: Use AI Product Photography to generate lifestyle scenes without a photoshoot. Modern AI can place your product in realistic environments (kitchen counters, office desks, outdoor settings) in minutes.
Lifestyle images increase average order value by 15-20% because they help customers visualize ownership and usage scenarios.
6. Packaging/Unboxing Shot
For products over $50 or gift items, showing the packaging creates perceived value and sets expectations. This is especially effective for:
- Luxury or premium products
- Gift-oriented items (jewelry, cosmetics, tech gadgets)
- Subscription boxes or curated collections
- Products where presentation matters (wine, chocolates, specialty foods)
Photograph the product in its packaging, partially unboxed, or with all components laid out neatly. This taps into the psychological appeal of unboxing experiences.
7. Comparison or Feature Grid
For products with multiple variants (colors, sizes, configurations), create a grid showing all options side-by-side. This reduces decision paralysis and increases conversion by 12-15% for products with 4+ variants.
Photograph each variant identically (same angle, same lighting, same position), then arrange in a grid using Photoshop or Canva. This visual comparison is faster to process than reading variant descriptions.
“The most effective product photography doesn’t just show what something looks like—it systematically eliminates every question a customer might have before clicking ‘Add to Cart.’”
Post-Production Workflow: From RAW Files to Conversion-Ready Images
Even perfectly lit product photos need post-production work. The goal isn’t to make products look better than reality—it’s to make digital images match how products look in person. Here’s the professional editing workflow:
Step 1: Culling and Selection (5-10 minutes per product)
Import RAW files into Adobe Lightroom, Capture One, or a free alternative like Darktable. Review each shot and flag the best image from each angle. Look for:
- Perfect focus on the most important product area
- No visible dust, fingerprints, or imperfections
- Proper framing with adequate white space around the product
- Consistent exposure across the entire image
Delete out-of-focus shots, duplicates, and any images with distracting elements immediately. This prevents decision fatigue later in the workflow.
Step 2: Global Adjustments (2-3 minutes per image)
Apply these corrections to every selected image:
- White balance correction: Use the eyedropper tool on your gray card reference to neutralize color casts
- Exposure adjustment: Ensure the white background is pure white (RGB 255, 255, 255) without blowing out product highlights
- Contrast increase: Add 10-15 points of contrast to make products pop off the background
- Sharpening: Apply 40-60 points of sharpening with masking to avoid sharpening the background
- Noise reduction: If you shot at ISO 400+, apply 20-30 points of luminance noise reduction
Create a Lightroom preset with these settings so you can apply them to entire batches with one click. This is how professionals edit 200+ images per day.
Step 3: Retouching (5-15 minutes per image)
Move flagged images into Photoshop for detailed retouching:
- Dust and spot removal: Use the Healing Brush or Clone Stamp to remove sensor dust, lint, and small imperfections
- Background cleanup: Ensure the background is perfectly white with no shadows or color variations
- Product refinement: Remove stray threads, wrinkles, or minor manufacturing imperfections (don’t alter the product’s actual appearance)
- Color correction: Use selective color adjustment layers to ensure product colors match reality
For faster background removal and cleanup, tools like our AI Background Remover can automate the most time-consuming parts of this process.
If you’re comparing editing tools, our Canva vs Lightroom vs Photoshop comparison breaks down which software is best for different e-commerce use cases.
Step 4: Resizing and Export (1-2 minutes per image)
Different platforms have different image requirements. Create export presets for each:
| Platform | Minimum Size | Recommended Size | File Format |
|---|---|---|---|
| Amazon | 1000px longest side | 2000px longest side | JPEG or PNG |
| Shopify | 800px longest side | 2048px longest side | JPEG (optimized) |
| Etsy | 2000px longest side | 3000px longest side | JPEG |
| Instagram/Social | 1080px square | 1080px square | JPEG (80% quality) |
Always export at the platform’s recommended size or larger. Platforms will downsize images automatically, but upscaling low-resolution images creates pixelation and blur.
For a complete guide to preparing images for maximum conversion, read our article on how to edit product photos for e-commerce.
Image Optimization for Speed Without Sacrificing Quality

High-resolution product images create a problem: they slow down page load times. Google’s data shows that 53% of mobile users abandon pages that take longer than 3 seconds to load. Every 100ms of additional load time decreases conversion by 1%.
The solution is image optimization—reducing file size without visible quality loss. Here’s how to do it correctly:
Compression Without Quality Loss
Use these tools to compress images by 40-70% without visible degradation:
- TinyPNG/TinyJPG: Lossless compression for PNG and JPEG files (free for up to 20 images at a time)
- ImageOptim (Mac) or FileOptimizer (Windows): Batch compression for hundreds of images
- Shopify’s built-in compression: Automatically compresses uploaded images (but you should still compress before uploading)
- Squoosh (web-based): Google’s image compression tool with real-time quality comparison
Target file sizes: 100-150KB for hero images, 50-80KB for alternate angles and detail shots. Larger images are acceptable for zoom-enabled photos, but the initial page load should use compressed thumbnails.
Responsive Images and Lazy Loading
Implement these technical optimizations on your Shopify store:
- Responsive images: Serve different image sizes based on device (mobile users don’t need 4000px images)
- Lazy loading: Load images only when they’re about to enter the viewport (reduces initial page load by 40-60%)
- WebP format: Modern image format that’s 25-35% smaller than JPEG with identical quality (fallback to JPEG for older browsers)
- CDN delivery: Serve images from geographically distributed servers (Shopify does this automatically)
Most modern Shopify themes handle responsive images and lazy loading automatically. Verify this by testing your store’s speed with Google PageSpeed Insights—it will flag unoptimized images.
If your existing product photos are lower resolution than ideal, our AI Image Upscaler can enhance them to 4K quality without re-shooting.
A/B Testing Your Product Photos to Maximize ROI
You’ve invested time and money into product photography for ecommerce—now validate which images actually drive conversions. A/B testing eliminates guesswork and reveals what your specific audience responds to.
What to Test
These variables have the highest impact on conversion rates:
- Hero image angle: Straight-on vs. 45-degree angle vs. in-use lifestyle shot
- Background color: Pure white vs. light gray vs. colored background that matches product
- Image count: 5 images vs. 7 images vs. 9+ images
- Detail shot prominence: Close-ups as image #2-3 vs. later in the sequence
- Lifestyle vs. studio mix: All studio shots vs. 50/50 studio and lifestyle vs. lifestyle-first
How to Run the Test
Use these tools to A/B test product images:
- Google Optimize (free): Create A/B tests for Shopify product pages
- Optimizely or VWO: Enterprise A/B testing platforms with advanced targeting
- Shopify A/B testing apps: Neat A/B Testing, Splitly, or Conversific
- Amazon Experiments: Built-in A/B testing for Amazon sellers (test main image and A+ content)
Run tests for at least 2 weeks or until you reach 1,000+ product page views per variation. Shorter tests produce unreliable results due to day-of-week and traffic source variations.
Interpreting Results
Look beyond conversion rate. Also track:
- Add-to-cart rate: Are images persuasive enough to get products into carts?
- Return rate: Do certain image styles lead to higher returns (indicating mismatched expectations)?
- Time on page: Are customers engaging with all images or bouncing quickly?
- Image interaction rate: Which images are customers clicking to zoom or expand?
If a lifestyle-first approach increases conversion by 8% but also increases returns by 12%, the net impact is negative. Always calculate the full funnel impact, not just top-of-funnel metrics.
For more advanced testing strategies, see our guide on A/B testing product images to increase conversion rates.
Frequently Asked Questions
How many product photos should I include per listing?
The optimal number is 7-9 images per product. Research from BigCommerce shows conversion rates plateau after 9 images—more doesn’t help and can create decision paralysis. The minimum is 5 images: hero shot, 2 alternate angles, 1 detail shot, and 1 lifestyle or scale reference shot. For high-value products over $200, consider 10-12 images including multiple detail shots and lifestyle scenes.
Can I use my smartphone for professional product photography?
Yes, if you have an iPhone 12 or newer, Samsung Galaxy S21+, or Google Pixel 6+. Modern smartphone cameras have 12+ megapixel sensors that exceed marketplace requirements. The limitation isn’t the camera—it’s lighting and composition. A smartphone with proper lighting produces better results than a DSLR with poor lighting. Invest in a tripod, LED lights, and white backdrop before upgrading your camera.
Should I hire a professional photographer or shoot products myself?
It depends on your SKU count and budget. Professional photography costs $25-75 per product for studio shots, or $500-2,000 for a half-day lifestyle shoot. If you have fewer than 20 SKUs and no photography experience, hiring a professional is cost-effective. If you have 50+ SKUs or launch new products monthly, learning to shoot in-house pays for itself within 3-6 months. The break-even point is typically 30-40 products.
What’s the best background color for product photography?
Pure white (RGB 255, 255, 255) is the industry standard and required by Amazon, Walmart, and most marketplaces. White backgrounds make products stand out, work across any website design, and are easiest to edit in post-production. However, A/B testing shows that light gray backgrounds (RGB 245, 245, 245) can increase conversion by 5-8% for dark-colored products like black electronics or dark apparel by creating better contrast.
How do I photograph reflective or transparent products?
Reflective products (jewelry, glassware, metal objects) require diffused lighting from all angles to eliminate harsh reflections. Use a light tent or surround the product with white diffusion panels. For transparent products like glassware, place a white or gradient backdrop behind the product and backlight it to create edge definition. Alternatively, use AI tools to generate clean product images without dealing with complex lighting setups.
What image file format should I use for e-commerce?
JPEG is the standard format for e-commerce because it balances quality and file size. Use 80-90% quality compression for most images. PNG is better for products with text, logos, or fine details that need lossless compression, but file sizes are 3-5x larger. WebP is the future—it’s 25-35% smaller than JPEG with identical quality—but requires fallback support for older browsers. Shopify and most modern platforms handle this automatically.
How can I make my product photos stand out from competitors?
Focus on storytelling through your image sequence. Instead of just showing what the product looks like, show how it solves problems, how it compares to alternatives, and how it fits into the customer’s life. Use detail shots to showcase quality that competitors hide. Include scale references to eliminate size confusion. Create lifestyle scenes that show aspirational use cases. The goal isn’t just to show the product—it’s to eliminate every question and objection before the customer has to ask.
Do I need to edit every product photo?
Yes, but the extent varies. At minimum, every image needs white balance correction, exposure adjustment, and background cleanup to ensure consistency across your catalog. Detail retouching (removing dust, stray threads, minor imperfections) is essential for products over $50 where quality perception matters. For budget products under $20, basic editing is sufficient. The editing level should match your product’s price point and target market’s expectations.
How do I maintain consistent product photography as my catalog grows?
Create a photography style guide that documents your exact setup: lighting positions, camera settings, angles, background color, and editing presets. Take reference photos of your lighting setup so you can recreate it exactly. Use the same equipment and shoot in the same location for every product. Build Lightroom presets for your standard edits. This systematization is how professional studios maintain consistency across thousands of SKUs. As your business scales, tools like AI Product Photography can help maintain visual consistency while reducing production time.
{
“@context”: “https://schema.org”,
“@type”: “FAQPage”,
“mainEntity”: [
{
“@type”: “Question”,
“name”: “How many product photos should I include per listing?”,
“acceptedAnswer”: {
“@type”: “Answer”,
“text”: “The optimal number is 7-9 images per product. Research from BigCommerce shows conversion rates plateau after 9 imagesu2014more doesn’t help and can create decision paralysis. The minimum is 5 images: hero shot, 2 alternate angles, 1 detail shot, and 1 lifestyle or scale reference shot. For high-value products over $200, consider 10-12 images including multiple detail shots and lifestyle scenes.”
}
},
{
“@type”: “Question”,
“name”: “Can I use my smartphone for professional product photography?”,
“acceptedAnswer”: {
“@type”: “Answer”,
“text”: “Yes, if you have an iPhone 12 or newer, Samsung Galaxy S21+, or Google Pixel 6+. Modern smartphone cameras have 12+ megapixel sensors that exceed marketplace requirements. The limitation isn’t the camerau2014it’s lighting and composition. A smartphone with proper lighting produces better results than a DSLR with poor lighting. Invest in a tripod, LED lights, and white backdrop before upgrading your camera.”
}
},
{
“@type”: “Question”,
“name”: “Should I hire a professional photographer or shoot products myself?”,
“acceptedAnswer”: {
“@type”: “Answer”,
“text”: “It depends on your SKU count and budget. Professional photography costs $25-75 per product for studio shots, or $500-2,000 for a half-day lifestyle shoot. If you have fewer than 20 SKUs and no photography experience, hiring a professional is cost-effective. If you have 50+ SKUs or launch new products monthly, learning to shoot in-house pays for itself within 3-6 months. The break-even point is typically 30-40 products.”
}
},
{
“@type”: “Question”,
“name”: “What’s the best background color for product photography?”,
“acceptedAnswer”: {
“@type”: “Answer”,
“text”: “Pure white (RGB 255, 255, 255) is the industry standard and required by Amazon, Walmart, and most marketplaces. White backgrounds make products stand out, work across any website design, and are easiest to edit in post-production. However, A/B testing shows that light gray backgrounds (RGB 245, 245, 245) can increase conversion by 5-8% for dark-colored products like black electronics or dark apparel by creating better contrast.”
}
},
{
“@type”: “Question”,
“name”: “How do I photograph reflective or transparent products?”,
“acceptedAnswer”: {
“@type”: “Answer”,
“text”: “Reflective products (jewelry, glassware, metal objects) require diffused lighting from all angles to eliminate harsh reflections. Use a light tent or surround the product with white diffusion panels. For transparent products like glassware, place a white or gradient backdrop behind the product and backlight it to create edge definition. Alternatively, use AI tools to generate clean product images without dealing with complex lighting setups.”
}
},
{
“@type”: “Question”,
“name”: “What image file format should I use for e-commerce?”,
“acceptedAnswer”: {
“@type”: “Answer”,
“text”: “JPEG is the standard format for e-commerce because it balances quality and file size. Use 80-90% quality compression for most images. PNG is better for products with text, logos, or fine details that need lossless compression, but file sizes are 3-5x larger. WebP is the futureu2014it’s 25-35% smaller than JPEG with identical qualityu2014but requires fallback support for older browsers. Shopify and most modern platforms handle this automatically.”
}
},
{
“@type”: “Question”,
“name”: “How can I make my product photos stand out from competitors?”,
“acceptedAnswer”: {
“@type”: “Answer”,
“text”: “Focus on storytelling through your image sequence. Instead of just showing what the product looks like, show how it solves problems, how it compares to alternatives, and how it fits into the customer’s life. Use detail shots to showcase quality that competitors hide. Include scale references to eliminate size confusion. Create lifestyle scenes that show aspirational use cases. The goal isn’t just to show the productu2014it’s to eliminate every question and objection before the customer has to ask.”
}
},
{
“@type”: “Question”,
“name”: “Do I need to edit every product photo?”,
“acceptedAnswer”: {
“@type”: “Answer”,
“text”: “Yes, but the extent varies. At minimum, every image needs white balance correction, exposure adjustment, and background cleanup to ensure consistency across your catalog. Detail retouching (removing dust, stray threads, minor imperfections) is essential for products over $50 where quality perception matters. For budget products under $20, basic editing is sufficient. The editing level should match your product’s price point and target market’s expectations.”
}
},
{
“@type”: “Question”,
“name”: “How do I maintain consistent product photography as my catalog grows?”,
“acceptedAnswer”: {
“@type”: “Answer”,
“text”: “Create a photography style guide that documents your exact setup: lighting positions, camera settings, angles, background color, and editing presets. Take reference photos of your lighting setup so you can recreate it exactly. Use the same equipment and shoot in the same location for every product. Build Lightroom presets for your standard edits. This systematization is how professional studios maintain consistency across thousands of SKUs. As your business scales, tools like AI Product Photography can help maintain visual consistency while reducing production time.”
}
}
]
}
{“@context”: “https://schema.org”, “@type”: “Article”, “headline”: “How to Set Up Product Photography for E-Commerce That Drives Conversions”, “description”: “Learn how to set up professional product photography for ecommerce that drives conversions. Equipment, lighting, shooting process, and editing workflow for online sellers.”, “datePublished”: “2026-08-03T00:20:40+00:00”, “dateModified”: “2026-08-03T00:20:40+00:00”, “url”: “https://pixelpanda.ai/blog/product-photography-ecommerce-setup-guide/”, “mainEntityOfPage”: {“@type”: “WebPage”, “@id”: “https://pixelpanda.ai/blog/product-photography-ecommerce-setup-guide/”}, “keywords”: “product photography for ecommerce”, “publisher”: {“@type”: “Organization”, “name”: “pixelpanda.ai”, “url”: “https://pixelpanda.ai”}}
{“@context”: “https://schema.org”, “@type”: “FAQPage”, “mainEntity”: [{“@type”: “Question”, “name”: “How many product photos should I include per listing?”, “acceptedAnswer”: {“@type”: “Answer”, “text”: “The optimal number is 7-9 images per product. Research from BigCommerce shows conversion rates plateau after 9 images—more doesn’t help and can create decision paralysis. The minimum is 5 images: hero shot, 2 alternate angles, 1 detail shot, and 1 lifestyle or scale reference shot. For high-value products over $200, consider 10-12 images including multiple detail shots and lifestyle scenes.”}}, {“@type”: “Question”, “name”: “Can I use my smartphone for professional product photography?”, “acceptedAnswer”: {“@type”: “Answer”, “text”: “Yes, if you have an iPhone 12 or newer, Samsung Galaxy S21+, or Google Pixel 6+. Modern smartphone cameras have 12+ megapixel sensors that exceed marketplace requirements. The limitation isn’t the camera—it’s lighting and composition. A smartphone with proper lighting produces better results than a DSLR with poor lighting. Invest in a tripod, LED lights, and white backdrop before upgrading your camera.”}}, {“@type”: “Question”, “name”: “Should I hire a professional photographer or shoot products myself?”, “acceptedAnswer”: {“@type”: “Answer”, “text”: “It depends on your SKU count and budget. Professional photography costs $25-75 per product for studio shots, or $500-2,000 for a half-day lifestyle shoot. If you have fewer than 20 SKUs and no photography experience, hiring a professional is cost-effective. If you have 50+ SKUs or launch new products monthly, learning to shoot in-house pays for itself within 3-6 months. The break-even point is typically 30-40 products.”}}, {“@type”: “Question”, “name”: “What’s the best background color for product photography?”, “acceptedAnswer”: {“@type”: “Answer”, “text”: “Pure white (RGB 255, 255, 255) is the industry standard and required by Amazon, Walmart, and most marketplaces. White backgrounds make products stand out, work across any website design, and are easiest to edit in post-production. However, A/B testing shows that light gray backgrounds (RGB 245, 245, 245) can increase conversion by 5-8% for dark-colored products like black electronics or dark apparel by creating better contrast.”}}, {“@type”: “Question”, “name”: “How do I photograph reflective or transparent products?”, “acceptedAnswer”: {“@type”: “Answer”, “text”: “Reflective products (jewelry, glassware, metal objects) require diffused lighting from all angles to eliminate harsh reflections. Use a light tent or surround the product with white diffusion panels. For transparent products like glassware, place a white or gradient backdrop behind the product and backlight it to create edge definition. Alternatively, use AI tools to generate clean product images without dealing with complex lighting setups.”}}, {“@type”: “Question”, “name”: “What image file format should I use for e-commerce?”, “acceptedAnswer”: {“@type”: “Answer”, “text”: “JPEG is the standard format for e-commerce because it balances quality and file size. Use 80-90% quality compression for most images. PNG is better for products with text, logos, or fine details that need lossless compression, but file sizes are 3-5x larger. WebP is the future—it’s 25-35% smaller than JPEG with identical quality—but requires fallback support for older browsers. Shopify and most modern platforms handle this automatically.”}}, {“@type”: “Question”, “name”: “How can I make my product photos stand out from competitors?”, “acceptedAnswer”: {“@type”: “Answer”, “text”: “Focus on storytelling through your image sequence. Instead of just showing what the product looks like, show how it solves problems, how it compares to alternatives, and how it fits into the customer’s life. Use detail shots to showcase quality that competitors hide. Include scale references to eliminate size confusion. Create lifestyle scenes that show aspirational use cases. The goal isn’t just to show the product—it’s to eliminate every question and objection before the customer has to ask.”}}, {“@type”: “Question”, “name”: “Do I need to edit every product photo?”, “acceptedAnswer”: {“@type”: “Answer”, “text”: “Yes, but the extent varies. At minimum, every image needs white balance correction, exposure adjustment, and background cleanup to ensure consistency across your catalog. Detail retouching (removing dust, stray threads, minor imperfections) is essential for products over $50 where quality perception matters. For budget products under $20, basic editing is sufficient. The editing level should match your product’s price point and target market’s expectations.”}}, {“@type”: “Question”, “name”: “How do I maintain consistent product photography as my catalog grows?”, “acceptedAnswer”: {“@type”: “Answer”, “text”: “Create a photography style guide that documents your exact setup: lighting positions, camera settings, angles, background color, and editing presets. Take reference photos of your lighting setup so you can recreate it exactly. Use the same equipment and shoot in the same location for every product. Build Lightroom presets for your standard edits. This systematization is how professional studios maintain consistency across thousands of SKUs. As your business scales, tools like AI Product Photography can help maintain visual consistency while reducing production time.”}}]}