Crop Image Online
Upload any image, select your crop area, and download — all in your browser.
You're just getting started
PixelPanda does way more than image editing. Create content that sells.

How It Works
Upload Your Image
Drop any image file — JPG, PNG, WebP, GIF, or BMP. No file size limit.
Select Crop Area
Click and drag to select your crop region. Use preset aspect ratios or crop freely.
Download
Click "Crop & Download" to get your cropped image as a high-quality PNG file.
What Is Image Cropping?
Draw a rectangle around the part you want to keep. Everything outside it disappears. That's the whole idea.
Cropping is the edit you'll use more than any other — and it's so straightforward that most people don't even think of it as "editing." There's a trash can in the corner of your vacation shot. Your subject is awkwardly off-center. Instagram needs a square but you shot a rectangle. A five-second crop fixes all of it.
People sometimes confuse cropping with resizing, but they're completely different operations. Resizing scales the entire image up or down (which can introduce blurring if you scale up too much). Cropping just chops off the edges and leaves everything inside the selection at its original quality. No stretching, no compression, no quality loss whatsoever.
Why Crop Images?
The reasons run the gamut. Tightening composition is a big one — shifting the subject to a rule-of-thirds intersection makes a photo look more deliberate, even if the original framing was a bit sloppy. Then there's the platform problem: every social network expects a different aspect ratio, and if you don't crop to fit, they'll do it for you (and they'll almost certainly chop off something important). E-commerce sellers crop product images to identical ratios so the catalog grid looks clean and professional rather than haphazard.
Common Image Aspect Ratios
Every platform wants a different shape. Here's a quick reference so you don't have to Google it every single time.
| Aspect Ratio | Common Use | Example Dimensions |
|---|---|---|
| 1:1 (Square) | Instagram posts, profile pictures, product thumbnails | 1080 x 1080 |
| 4:3 | Standard photos, presentations, iPad displays | 1600 x 1200 |
| 3:2 | DSLR photos, 35mm film, prints (6x4) | 1800 x 1200 |
| 16:9 | YouTube thumbnails, widescreen displays, video | 1920 x 1080 |
| 9:16 | Instagram Stories, TikTok, Reels, phone wallpapers | 1080 x 1920 |
| 5:4 | Large format prints (8x10), social media posts | 1500 x 1200 |
| 4:5 | Instagram portrait posts, Pinterest pins | 1080 x 1350 |
| 2:1 | Twitter/X header images, panoramic web banners | 1500 x 750 |
| 2.35:1 | Cinematic widescreen, movie-style banners | 1920 x 817 |
Image Cropper Features
What you get (and what you don't get — namely, server uploads or account requirements).
100% Client-Side
Your images never leave your device. All cropping happens locally in the browser.
Preset Ratios
One-click presets for 1:1, 4:3, 16:9, 9:16, 3:2, 5:4, and 4:5 aspect ratios.
Free-Form Crop
Drag any edge or corner to create custom crop areas with no ratio constraints.
Pixel-Perfect
See exact pixel dimensions of your crop selection and the resulting image.
Unlimited & Free
No daily limits, no sign-up, no watermarks. Crop as many images as you need.
High-Quality PNG
Download cropped images as full-resolution PNG files with no quality loss.
Image Cropping Use Cases
If you work with images at all, you crop them. Here's where it comes up most often.
Social Media Posts
Instagram feed posts need 1:1 squares. Portrait posts that fill the screen? 4:5. Stories and Reels? 9:16. YouTube thumbnails? 16:9. Skip the cropping and the platform will auto-crop for you — and it almost always cuts off the worst possible part.
E-commerce Product Photos
A product grid where every image shares the same ratio looks professional. One where the ratios are random? Looks like a flea market listing. It takes about two minutes per image to get them all consistent, and it makes a bigger visual difference than people realize.
Profile Pictures & Headshots
LinkedIn, Slack, Zoom, Twitter — basically every platform with a profile picture wants a square. Grab any photo with a face in it, crop to 1:1 centered on the eyes, and you've got a perfectly usable headshot. No photographer appointment required.
Website Banners & Headers
Hero images and email banners tend to be extremely wide — 16:9 or even 2:1 panoramic strips. You probably already have a great photo for it, but it needs to be cropped to that wide format. That's where you decide which slice of the image gets the spotlight.
Print & Presentations
Want to print at 4x6? That's 3:2. An 8x10 frame? That's 5:4. If the photo doesn't match the print ratio, the lab will either add white bars or clip the edges — and they won't know which part of the image matters most. Crop it yourself first.
Photography Composition
Even professional photographers crop after the fact. You can't always nail the framing in the moment — the subject shifts, there's a distracting trash can at the edge, or the horizon isn't quite centered. A modest crop in post often turns a decent shot into a genuinely good one.
Image Cropping Tips for Best Results
A few pointers that'll save you from re-doing the same crop three times.
Start with the Highest Resolution Available
Cropping throws away pixels — that's literally what it does. If you're starting with a 4000x3000 image, no problem; you've got pixels to burn. But if your source is only 800x600 and you crop half of it away, you're left with something too small to use almost anywhere. Always grab the original full-resolution file before you start cutting.
Know Your Target Dimensions Before Cropping
Eyeballing it and hoping for the best rarely works out. Instagram feed? 1080x1080. YouTube thumbnail? 1280x720. LinkedIn post? 1200x627. Look up the recommended size for wherever the image is going, select the matching aspect ratio from the presets, and you won't have to redo the crop when the platform chops your image in an unexpected place.
Use the Rule of Thirds
Picture a tic-tac-toe grid laid over your image. If you place the subject on one of the four intersections instead of dead center, the photo almost always looks better. It's the oldest composition trick in photography, and it works just as well when you're adjusting the frame in post as it does behind the camera.
Leave Breathing Room
It's tempting to crop as tight as possible, but don't. Headshots need space above the head and below the chin or they feel claustrophobic. Product images need a margin around the item so it doesn't look like it's being squeezed out of the frame. A little negative space makes the difference between "carefully composed" and "accidental tight shot."
Check the Result at Display Size
Your crop might look sharp at full screen, but the image may end up displaying at 200x200 pixels as a profile pic or thumbnail. Zoom out and check before you download. An overly aggressive crop can leave you with something that looks fine big but becomes an unreadable smudge at small sizes. When you're unsure, crop less.
Frequently Asked Questions
Is my image uploaded to a server?
Is there a file size limit?
What output format is the cropped image?
Does cropping reduce image quality?
What aspect ratio should I use for Instagram?
Can I crop to exact pixel dimensions?
Does it work with transparent images?
Can I crop animated GIFs?
How many images can I crop?
Does it work on mobile phones?
What's the difference between cropping and resizing?
Can I undo a crop?
How do I crop an image to a specific size for a website?
What aspect ratio should I use for YouTube thumbnails?
How do I crop a photo to passport size?
Can I crop a photo into a circle?
What is the rule of thirds and how does it help with cropping?
How do I crop a landscape photo to portrait orientation?
What is the best crop size for Facebook cover photos?
How do I straighten a crooked photo while cropping?
Can I crop the same image multiple times with different ratios?
Image Crop Sizes for Every Social Media Platform
The exact aspect ratios and pixel dimensions you need for every major platform — so your images never get cropped awkwardly by the platform itself.
Instagram Crop Sizes
Instagram supports three aspect ratios for feed posts: 1:1 square (1080x1080), 4:5 portrait (1080x1350), and 1.91:1 landscape (1080x566). The 4:5 portrait takes up the most screen real estate in the feed and consistently gets better engagement. Stories and Reels use 9:16 (1080x1920), which fills the entire phone screen. Profile pictures are displayed at 110x110 but uploaded at 320x320 — crop to 1:1 square for best results.
YouTube Crop Sizes
Thumbnails: 1280x720 (16:9). Channel banner: 2560x1440, but the safe area visible on all devices is 1546x423 in the center. Channel icon: 800x800 (1:1 square). For video content itself, always stick to 16:9 — uploading other ratios will cause YouTube to add black bars (pillarboxing or letterboxing).
Facebook Crop Sizes
Feed posts: 1200x630 (1.91:1) for link previews, 1080x1080 for square photo posts. Cover photo: 820x312 on desktop, 640x360 on mobile — design for the overlapping safe area. Profile picture: 170x170 on desktop, 128x128 on mobile, uploaded as at least 320x320 square. Event cover: 1200x628. Group cover: 1640x856.
LinkedIn, X/Twitter, and Pinterest
LinkedIn: profile photo 400x400 (1:1), background photo 1584x396 (4:1), feed posts 1200x627 (1.91:1). X/Twitter: profile photo 400x400, header 1500x500 (3:1), in-stream images 1600x900 (16:9). Pinterest: standard pin 1000x1500 (2:3), long pin up to 1000x2100. Pinterest rewards tall images — the 2:3 ratio is optimal for the vertical feed layout.
Image Cropping Tips for Better Composition
Cropping is not just about cutting — it is one of the most powerful composition tools available. Here is how to use it to transform ordinary photos into compelling images.
Crop to Remove Distractions
The most common reason to crop a photo is to remove distracting elements at the edges — a stray arm, a trash can, a bright object pulling the eye away from your subject. Before cropping, scan all four edges of your image and ask: does everything in the frame serve the photo? If not, tighten the crop. A simpler frame almost always makes a stronger image.
Use Negative Space Intentionally
Negative space (empty area around your subject) creates visual breathing room and draws attention to the subject. When cropping, consider leaving more space on one side — especially the side your subject is facing or moving toward. This creates a sense of direction and story. Too-tight crops feel claustrophobic; strategic negative space feels intentional and professional.
Avoid Cropping at Joints
When cropping portraits, never cut at a person's joints — ankles, knees, wrists, elbows, or neck. Cropping at these natural breakpoints creates an amputated look that feels uncomfortable to viewers. Instead, crop at mid-thigh, mid-forearm, or mid-chest. If you cannot avoid a joint, go slightly above or below it. This rule applies to product photos too — do not cut off handles, lids, or other functional parts of objects.
The Crop-and-Rotate Technique
Many photos look slightly tilted because the camera was not perfectly level during capture. The fix: rotate the image 1-3 degrees to straighten the horizon, then crop away the resulting white triangles at the corners. This works particularly well for landscape photos, architectural shots, and any image with a visible horizon line or strong vertical elements like buildings and door frames. Use our free Rotate tool first, then return here to crop.
Related Free Tools
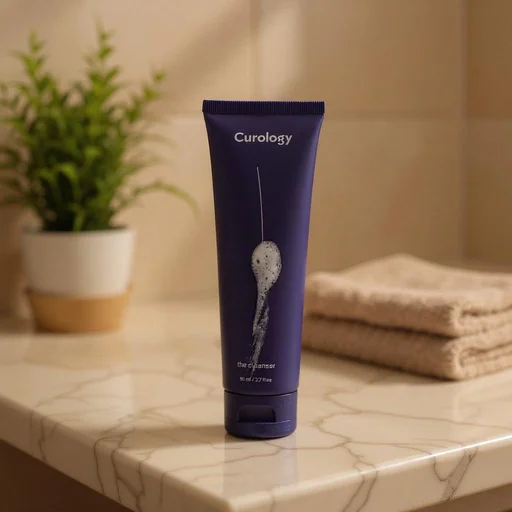
Need Professional Product Photos?
Turn any product image into studio-quality lifestyle scenes, model shots, and marketplace-ready photos — in seconds, not days. AI product photography starting at $0.029/image.
Explore AI Product PhotographyGo beyond editing — create content that sells
AI product photography, UGC videos, and custom avatars. Everything you need to scale your brand's content.
Try It — 280 Credits/week for $7.99Pro Version
Upgrade Smart Crop
- Aspect ratio presets: 1:1, 4:3, 16:9, 9:16
- All edits saved to your account
- Access 29 image tools in one dashboard
Why The Presets Exist
The default presets are 1:1, 4:5, 16:9, 9:16. Those are not arbitrary — those are the four ratios that cover ~95% of social, ad, and web usage in 2026.
Behind those: a custom-ratio input for the long-tail cases (book covers, A4 prints, custom Pinterest sizes). The crop runs in the browser via canvas — your photo never leaves the device.
Related Free Tools
More free image tools — no signup required